
(15/12/05)
Well my wiring loom has finally come so after a slight respite, I'm off again building.I decided to go for the Premier Wiring loom which is not only a bit cheaper than the Westfield item, but it also gives you a bit more scope to be a bit creative (i.e. Run the wires where YOU want them to go rather than be restricted).


As you can see (pic1), the loom is very neat and compact but not labelled. There is extra wire for you to run around whatever bits you need. You then need to terminate them with the supplied connectors using the supplied crimpers (what a bonus, another set of crimpers). It even includes some extra plastic sleaving and a length of conduit too with fairly easy instructions.
First job was to check all the wires were there and label them up pic 2), I found there was extra connectors for accessories underneath the dash. Let's see, fag lighter, stereo, map light, heated seats ....... have I forgotten anything?
I took the loom out to the car and was surprised at the length of it, LOADS left over. Although it has to go around tubes etc, there must have been about 5 foot slack at the front and about 8 foot at the rear - whoah.

As previously mentioned in Chassis, I wanted to fusebox under the dash so the scuttle base was nice and clear from clutter. I made up a bracket which I slotted ready to bolt down somewhere near the centre of the dash but this may move slightly later on.
I also grommeted the bracket to stop chaffing, I'll glue the slit back together with superglue later on.


 Next was to run the loom around the car to the approx position of where I wanted it to go.
From the Dash, the engine ancillaries went down the right side, this is where the starter, alternator and water temp will go. The wires for the lights went down the left side.
Although this would technically be over the exhaust, they will be well tucked away behind the chassis tubes.


 Next was down the passenger side of the tunnel (top), round the left of the rear chassis and along the rear to the right lights where they will terminate.
I intend to just slit the plastic sleaving to split to either side of the car for lights etc.
As you can see, there is plenty of wire left over at both ends.
(21/12/05)
Decided to tackle a bit more of the wiring today as I now have my tiewrap saddles. These little things enable you to fix a tiewrap to places where you can't wrap around a tube, i.e. underneath the tunnel etc.I managed to drill several holes down the tunnel and rivet the saddles into place, I then ran the rear part of the loom along the passenger side as above and around the rear diff carrier. I tied them all down only to realise that I hadn't threaded them through the tunnel top front cover - What a dope!
I cut them all off and low and behold, a package arrived with my Body fitting kit from Westfield's, in this was a bleeding big grommet for the said tunnel cover.


 These pics show the top (covered in cardboard for protection during build). Then down through the grommet, around the left using saddle tiewrap fixings and towards the front ready for the lights, horn and radiator fan.
The last pic is the other side of the engine bay where all the engine connections will be made (alternator, Starter etc).


This shows the rear loom going down the tunnel (passenger side top), neatly around into the rear compartment, and along the rear of the diff carrier.
I cut a slit along the run for the handbrake wire to exit. I've also had to add a few earth wires into the rear for lights, fuel pump etc as these weren't included in the loom - easy enough though. Also ran a double wire to the right rear light to run back to the number plate light - almost forgot that one!
It still looks a mess but hopefully, when I have something to connect it all to, it will look much tidier.
(11/03/06)
Wired up the Alternator to the Starter today. This entailed running twin 20amp (I think) cables from the Alternator to the Starter, then the main feed to the Loom, Ignition switch and big cable from the Battery onto the Starter. Lots of cables in a confined space was fun but they look tidy enough. I just hope it all works once it connected the other end (fingers crossed)
(14/03/06)
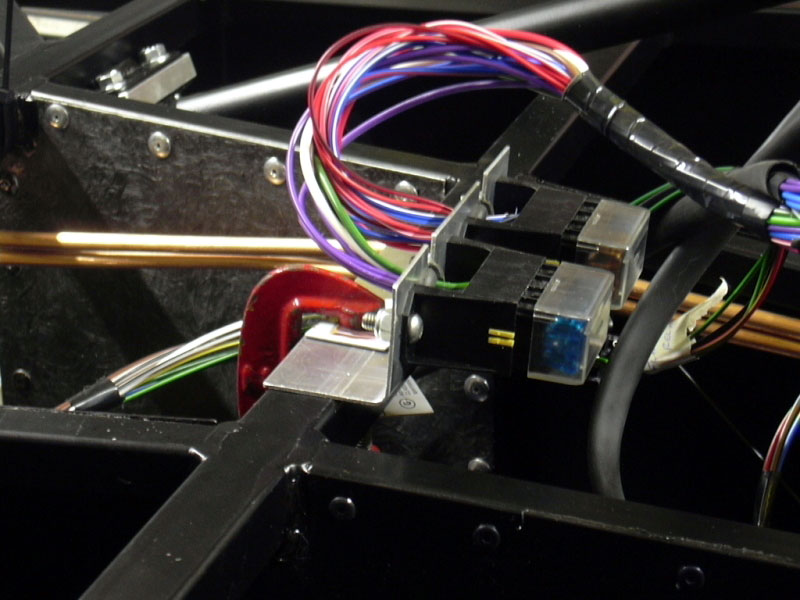
I've been trying to work out a place to put the Air Temperature sensor for ages. The requirements are to put it out of the flow of oncoming air and away from the engine heat.
 My solution was quite by accident, as I had to move the engine back, it left a perishing big hole in the chassis which I didn't like the look of so ........ that's where I put the Air temp sensor.
It solves three problems as this is right behind an apex in the chassis which shields it from oncoming air flow, it's away from the heat and it fills up the hole nicely.
Simply mounted into a rubber grommet which the sensor is then screwed into. It doesn't come any simpler than that readers.
(20/03/06)
Dashboard time - Yesss! I have opted for a Carbon Dashboard but not a shiny one, I've had one specially made in a satin finish to stop any glare (made by Mickmade from the WSCC Forum).
 So I didn't make a complete hash of the Carbon Dash, I've made up a dummy dash (in plywood) to work with so I can get the dimensions correct.
The dials are from ETB instruments and match the colour of the car nicely.
See all that wiring in pic 2, well I'm supposed to make some sense of that - wish me luck!

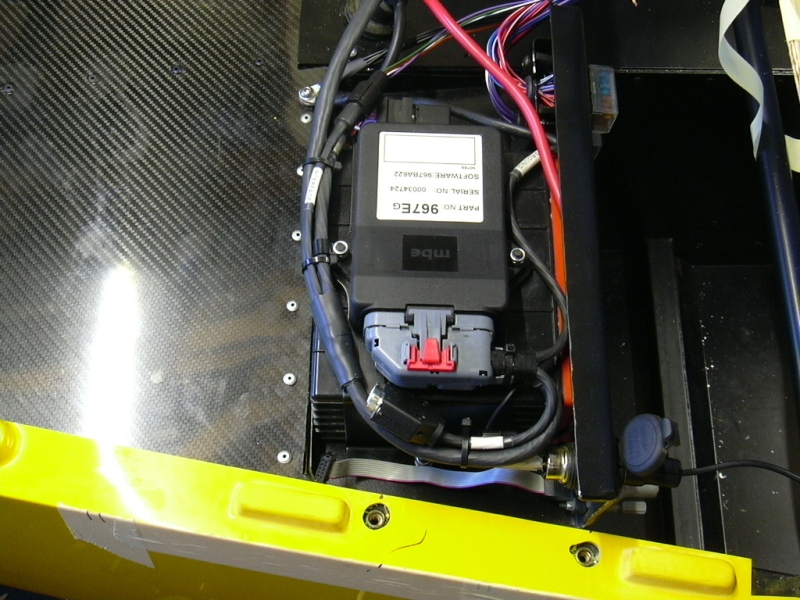
I've also finished off the battery tray and wired it all up, at least I'll have some electric to blow some fuses with now - lol. Well when I say finished, just got to get a connector to join up my ECU to the external plug on the front of the tray for mapping etc. Maplins here I come!
(26/03/06)
This is taking ages, I think the next car I build (if ever), I'll get a loom already made. There is one benefit however, it's customisable so I can fit it which every way around I like, it just takes a bit more time.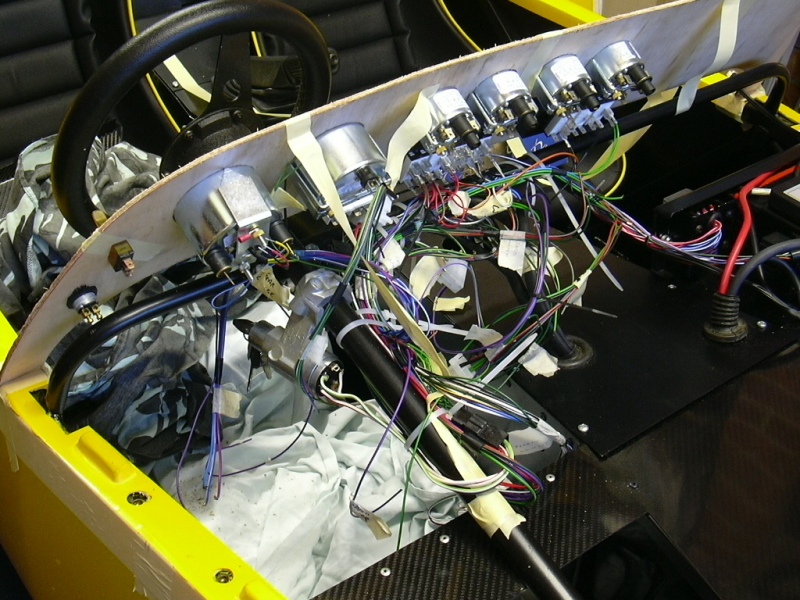 After much deliberation (good word that), I've decided which way around the loom will go. After untangling it all, I've attached most of the switches. A few more wires had to be fixed in for jumping the switches to illuminate them but nothing too taxing, just fiddly. More to come.
(29/03/06)
Not much to say really, more wiring but it looks a bit nicer now and a whole lot more together.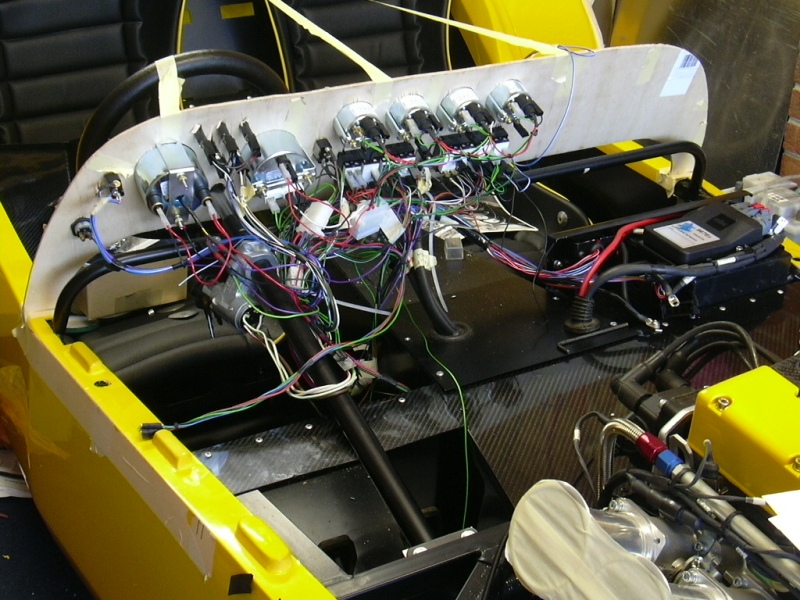 This has taken a few days due to looking up how to wire the Durite switches, not many people know and the diagrams from Durite themselves were only a little more helpful. With this in mind, I have created some Diagrams for future users. They can be found on my Main Site on this link - Durite Switch Wiring. Most of it's done now except the wiper motor which only has it's position to finalise and the heated windscreen. Then wrap it all up with tape/conduit and/or spiral wrap.
 Also connected and mounted the horns in the only place left due to the front ARB. These may have to be re-mounted because they only make a horrible buzzing noise. This is because they need to be mounted on a thin metal bracket to allow them to vibrate (which they aren't at the moment).
(07/04/06)
Time to get a little more light on the subject (corny I know). I've already put the front ones on so I could do a bit more wiring but that's foolproof. They are the SVC "Carbon look-a-like" jobbies and are ok if you can't afford the real thing.The rear end however is a little more involved.

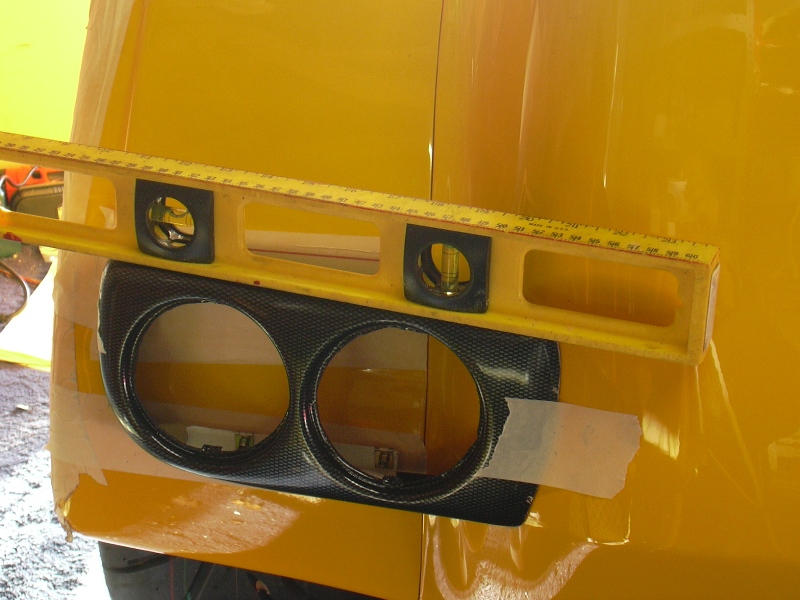

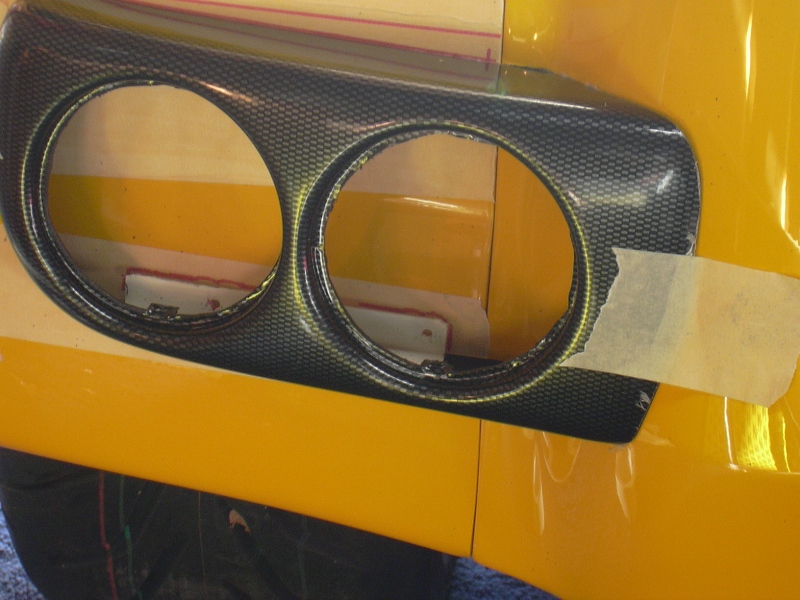
 Firstly I've marked a horizontal line across the bodywork in Pic 1, sorry the camera's wonky. Then offered the light up to the body and taped it so that it's front edge is also horizontal. Pic 3 show how much the housing is out at the point of contact with the bodywork. This is ok though because you can push it up when fixing it so it matches the horizontal line. Pic 4 show the edge that I had to feather down a bit to give a smooth fit.
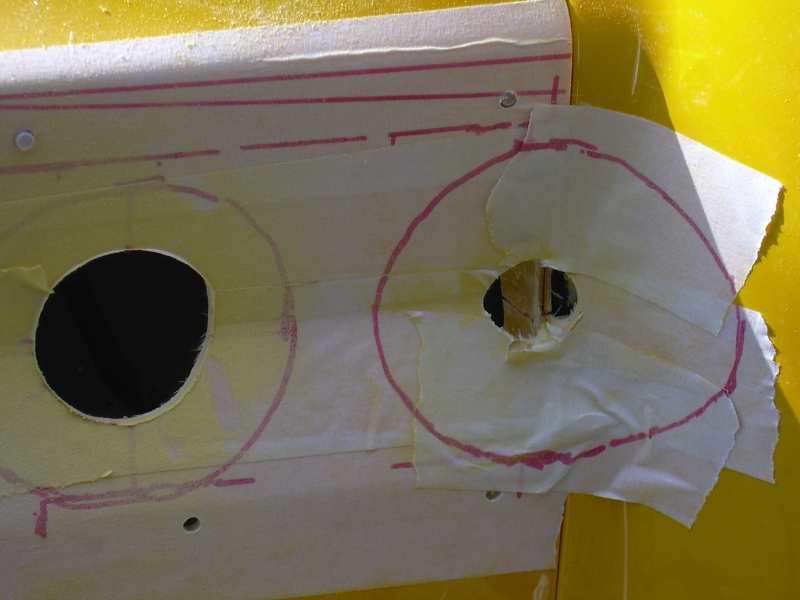

I had to remove the fixing clips from the white brackets to get a marker for the holes but to do this, it was necessary to push the housing up to the line. Once this was bolted into place I marked out the holes, centered them and cut out the clearance for the lights to pass through the body.
The inner circle (brake/sidelight) went right through the join of the detachable arch so this had to be cut away from the back (pic3). Once the holes had been suitably dremmeled I fixed the lights to the housings with silicone and bolted into place which was tedious. To line up the housing with the bolt holes, I had to use a long thing screwdriver to push it into place but got there in the end.
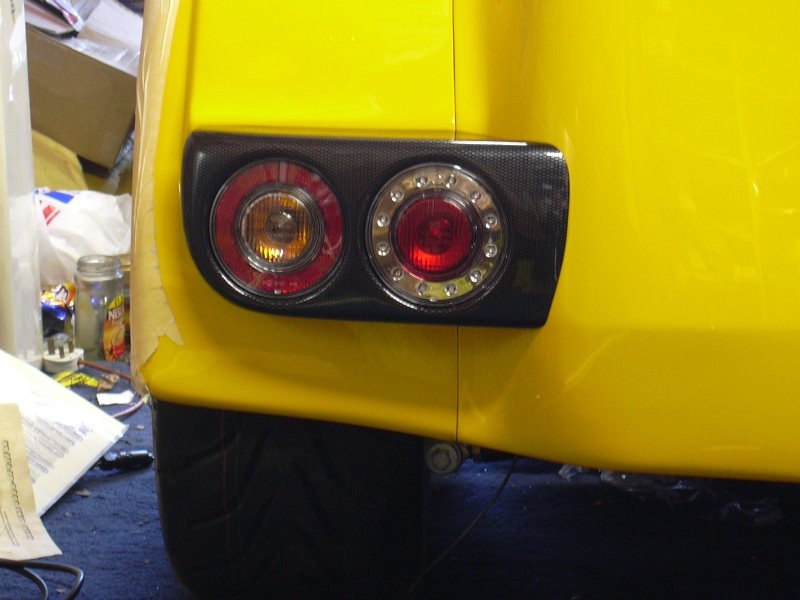
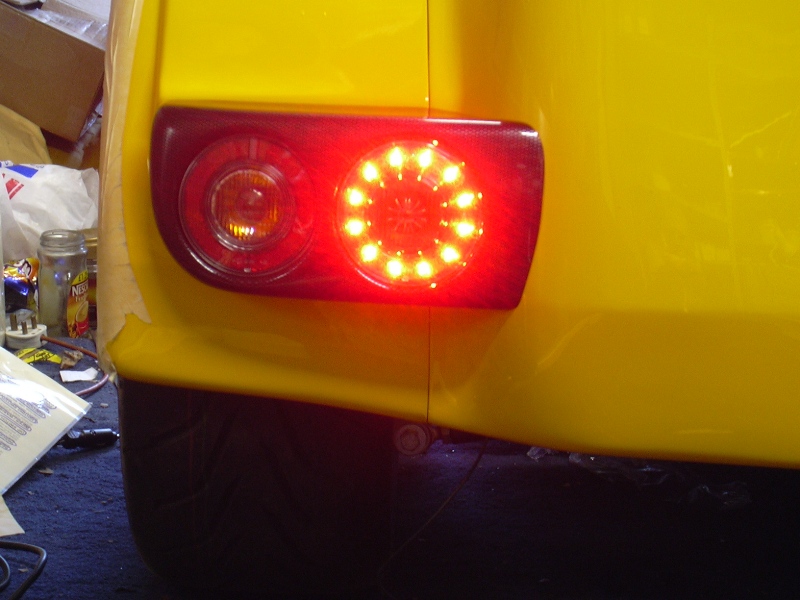 This shows the side lights in operation, if your interested, check back later when I will have a small movie of them all working together.
The right hand side was more difficult as the arches are not symmetrical, no surprise there then! It's a case of "Do you line it up with the body" or "Make it horizontal and sod the body lines" ........ I went for Horizontal otherwise it would look on the P**s from a distance.
(11/04/06)
Whilst the rear of the car is still covered in yellow powder and as I had the fog/reverse lights, I decided to do them next to finish off the back end finally.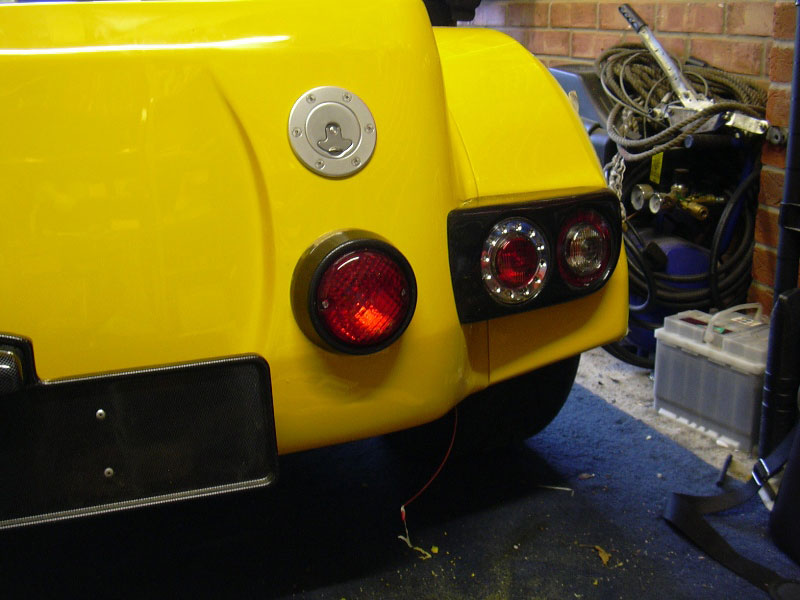
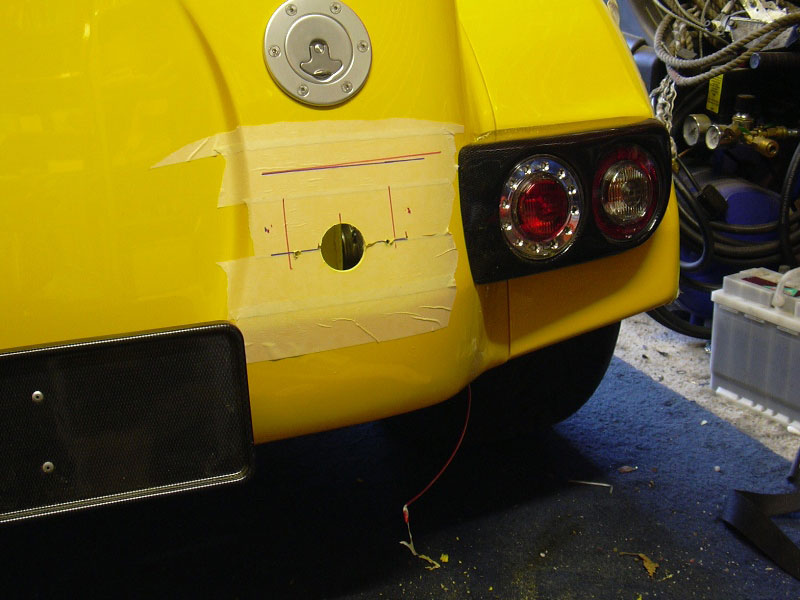
 This involved lining up the light housings with the already fitted rear light so they at least look level even if they're not (exactly). I've used the fuel filler as a marker to determine the distance away from the rear light so the fog light is directly underneath the filler. It also happens to be enough of a distance for SVA purposes (100mm from brake light).
 Drilled yet another couple of holes in the bodywork, dremmeled it out and the light just pokes through the rear of the bodywork nicely in line with my wiring.
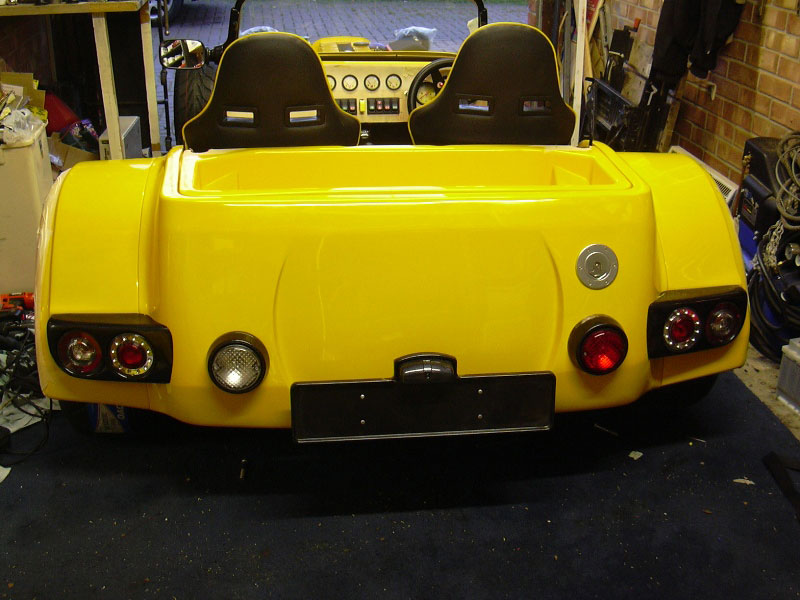
One thing to note, it looks like Westfield have 2 different depths of housing for these lights, how do I know, I have one of each. Another call to Westfield, I'm just grateful this is one of the BETTER kitcar companies.
Third pic above shows both lights fitted after making up the connectors and wrapping the wiring up all tidy.
(15/04/06)
After about 3 goes, I finally got a matching pair of side repeaters so more holes to cut today.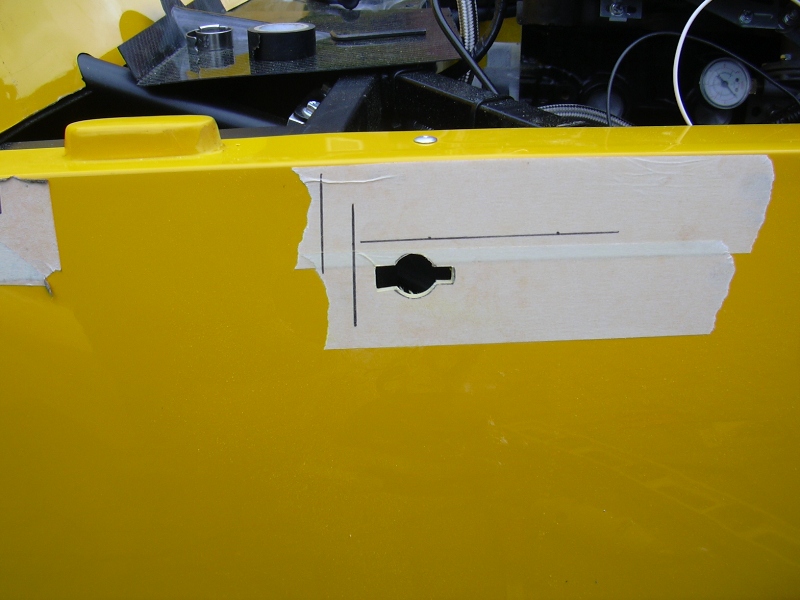
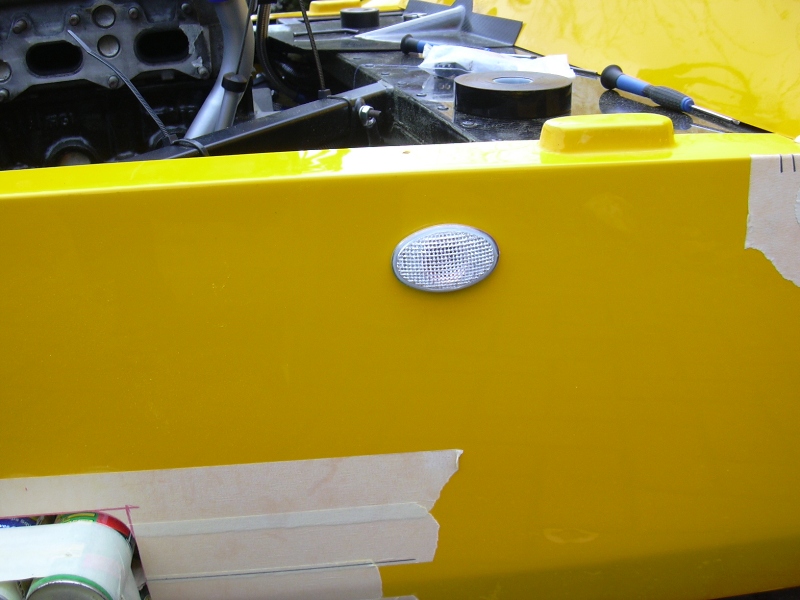 There are measurements in the manual for the actual location of these so I won't bore you. As you can see from the first pic, I choose the type of repeaters with the little lugs on the side (round ones are available too). This of course made the hole harder to whittle out but they seem to fit tightly with double sided foam. I have tie-wrapped all the wiring tidily behind and tested but not too happy with the colour, may change them at a later date as they are supposed to be "smoked", they must have been a light smoker then?
(23/04/06)
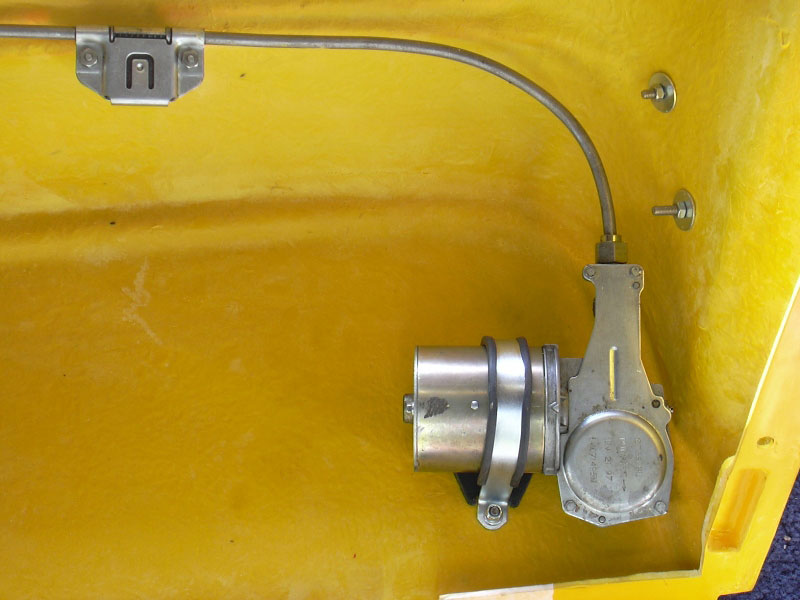
Wiper motor is a pain to fit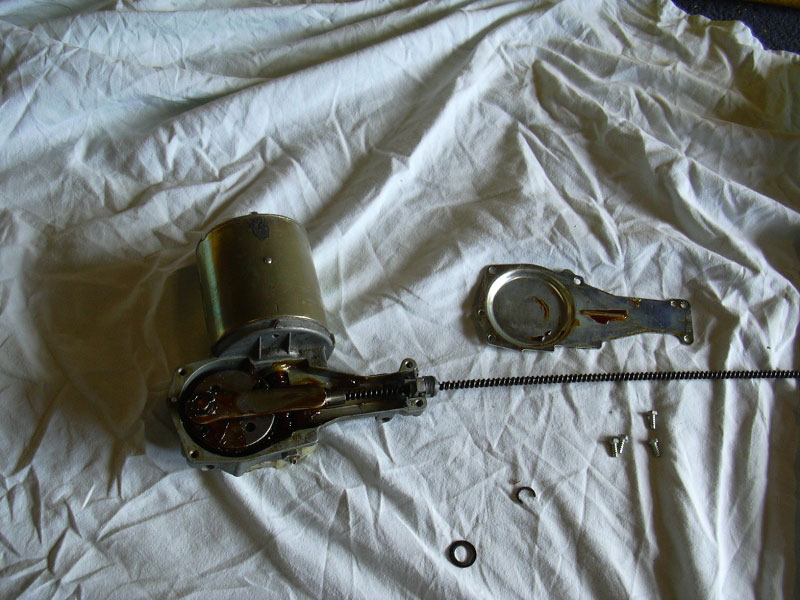
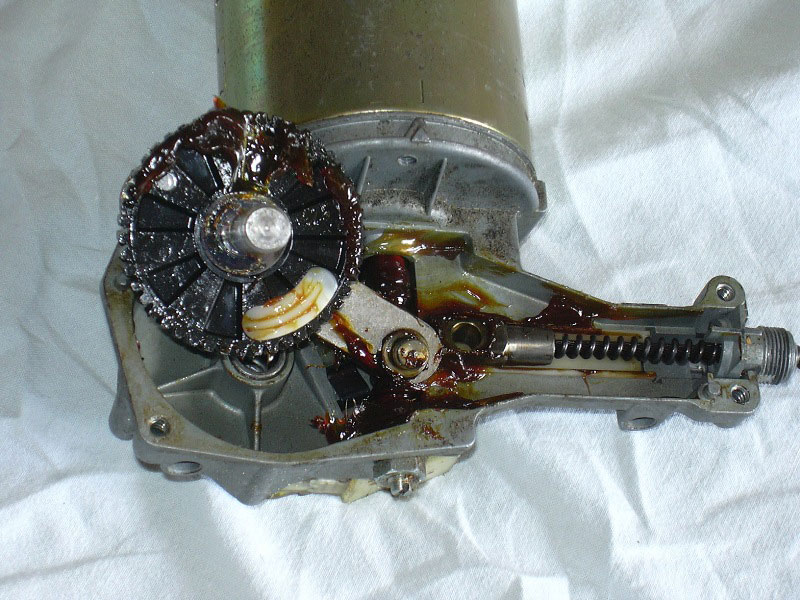
 I had to fit the wiper motor on the right of the scuttle due to no room on the left because it's taken up by the battery tray and ecu (See above), therefore I had to change the parking of the wipers over to the opposite side, this is easily done by taking the motor apart (pic1), removing the white plastic cam stop from the front and pushing into to the back position (see pic3). This would then stop the wipers on park in the correct position (hopefully).

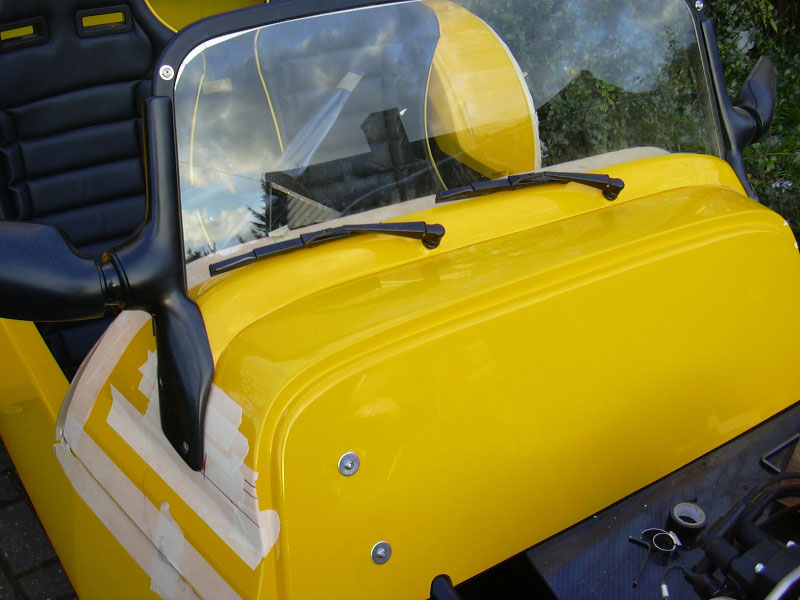 With this now done, I lined up the wheel boxes with the holes in the scuttle and marked a position for the wiper to go. As it goes, luck would have it that it just misses the steering column which is a nice change.
I had to bend the middle section of the tubes (pic2) to get the gap right otherwise it would have meant cutting and re-flaring the tubes and I wasn't in the mood for messing about today. Note nice clean curve which helps with operation.
Finally, attached the fillet and wiper collets and jobs a good one, just have to fit the washer now and I'm all ready to go out in the rain.
(20/05/06)
Oops, forgot the washer bottle. Whilst I would have been ok in the rain, I still need a washer bottle. Not sure if I've mentioned this but I intend to have the complete scuttle removable so I can swap it with another one with an Aeroscreen fitted so ... my washer bottle has to fit within the scuttle area.
 I obtained a nice small bottle from good old Ebay which is a 1 litre "Tudor" as fitted to Mini's, this is a quality bottle which came with an external pump. I then had to make a bracket to bolt the washer bottle to which fixed inside the scuttle area. The washer pump was also bolted to this bracket.

 The bracket afixes to the two bolts of the windscreen support arm (inside obviously) and the rearmost bolt that hold down the scuttle to the chassis.
I thought it would have been very awkward to unbolt the scuttle with this in place but it's not too bad.
As you can see in the last pic of the set, the washer tube runs nicely into the twin washer jets (just out of view) and works perfectly. Topping it up is a bit tricky but I'll probably hardly use it.