
(19/02/06)
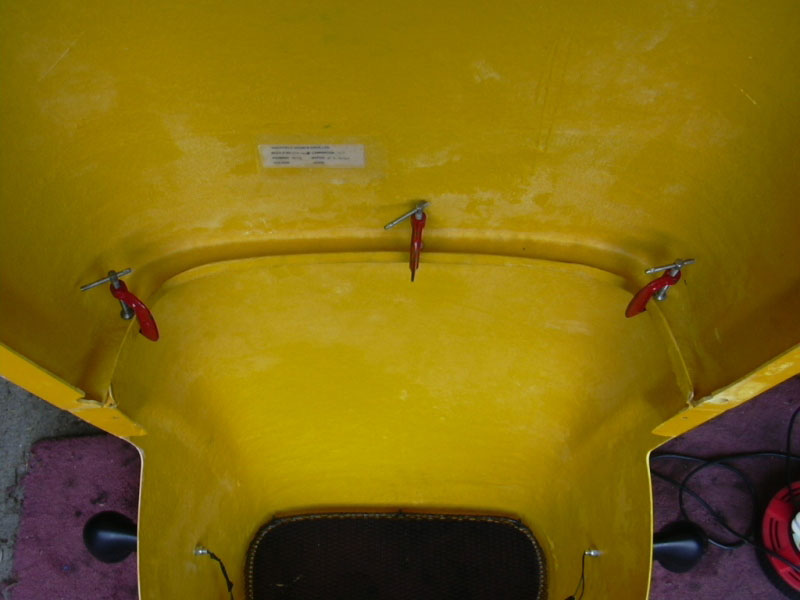
This is one of the major milestones in my build (the other being the engine). Fitting the bodywork, well I haven't actually fitted, more like placed it over the chassis for now as it was getting to the end of the day. First I had to get the car out of the garage so a major clear-up was needed and engine moved outside & then lower the bodywork from the rafters. The arches amongst other body parts have been stored in the house, thank goodness "Me Julie" is kind hearted (I hope she's reading this!)
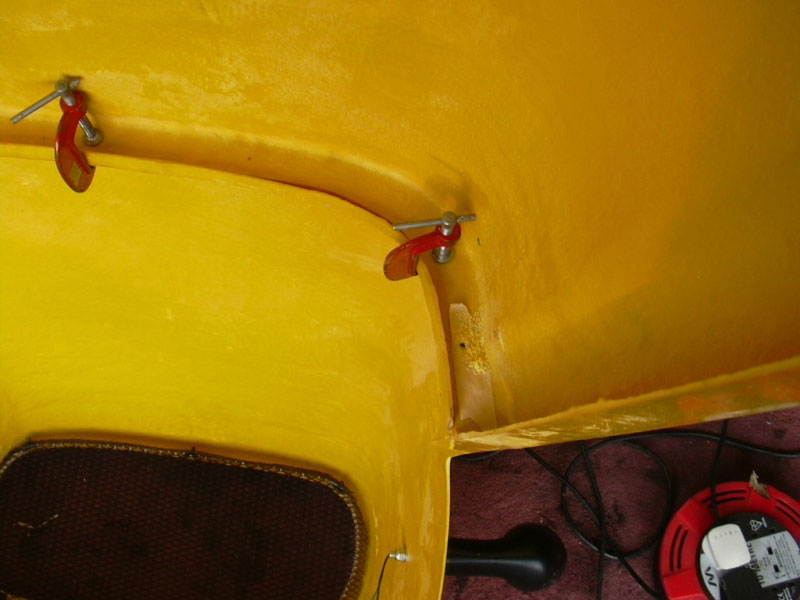
  Next job then was to fit the detachable arches, the manual says to fit these before putting the body onto the chassis, I can see why - it's more rigid and you can get inside to drill the 20 holes to fit the arches easier. I am using plastic number plate bolts so that hopefully in the event of catching them on something, they won't rip off the bodywork (well that's the theory).
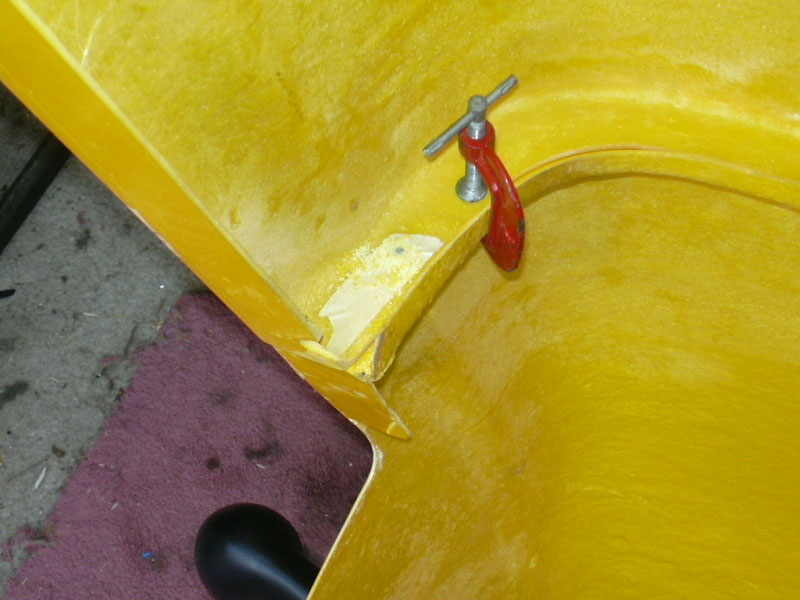
 I had to sand down a few bumps and moulding marks so they fitted smoothly but it wasn't too bad. Once one, it looked great and a lot more rigid too.
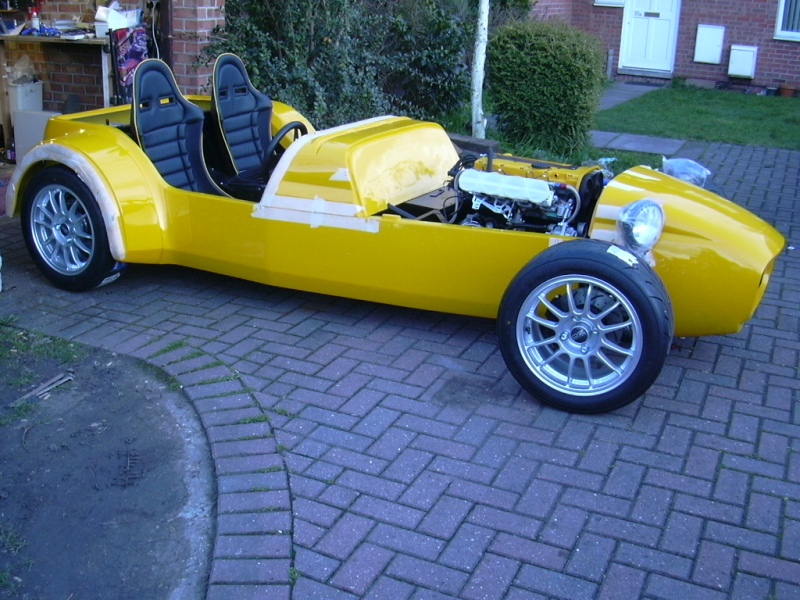
By now my chassis was getting soaked outside so a quick hand from "MJ" and the body was on, simple job of tilting at 45 degrees up, hooking the backend on and then pushing over the tubes.
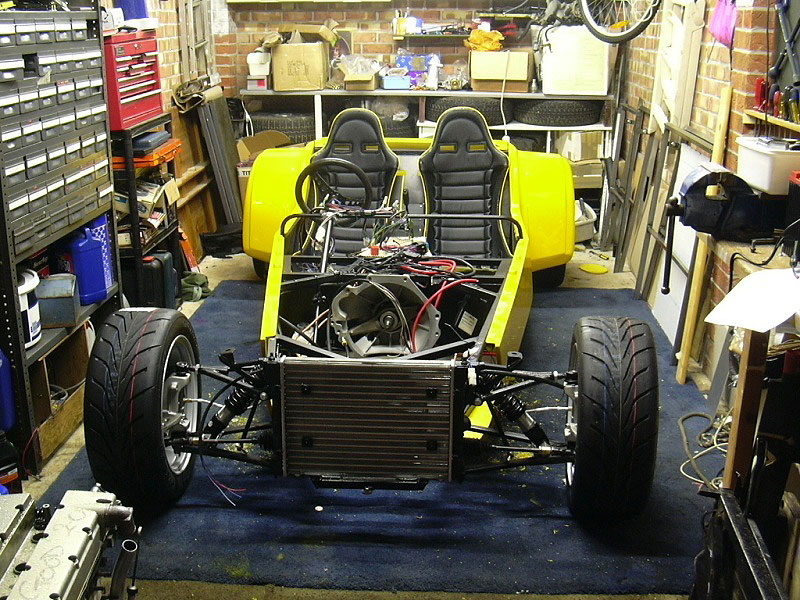 It now looks like THIS (pic 4), some pictures of the rolling chassis can be found HERE. I can now get on with fitting the scuttle, lights etc etc.
Well that's the easy bit done, just wait until I have to start cutting holes in it - Arrrgghhh!
(13/03/06)
Trial fitted the scuttle, bonnet and Nosecone today.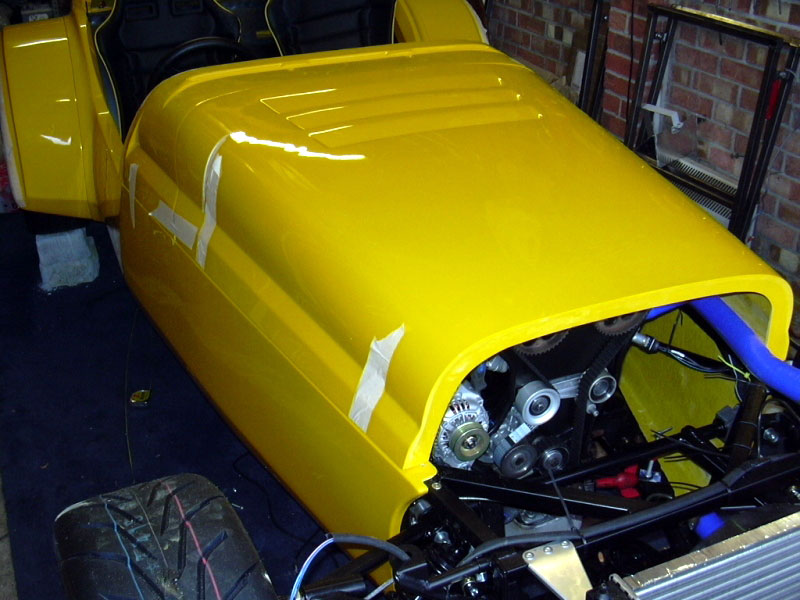 As expected, it didn't line up very well. There was a big gap between the scuttle and bonnet and the front left of the bonnet didn't line up with the nosecone otherwise it wasn't as bad as I thought it would be.
I had to use the trusty dremmel to sand down the mounting blocks on the tub so the scuttle came forward a bit and the bonnet went back a bit. The front of the bonnet will pull in hopefully - More pics to follow.
(21/03/06)
Now I've put the scuttle, bonnet and nose on a few times (and took them off again), I'm happy to start securing the bodywork to the chassis.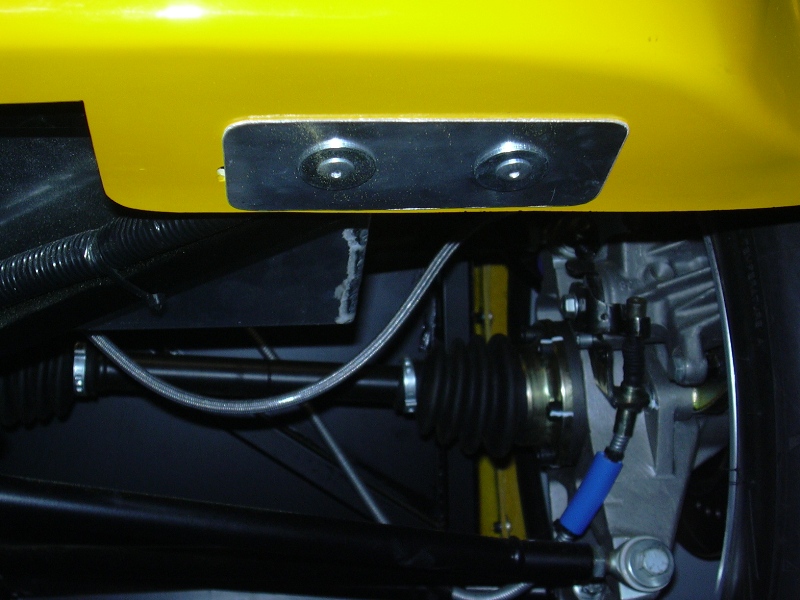 To start with, I've fitted the rear of the bodywork to the chassis (bad pic sorry). I've had this jacked up progressively for the last 6 days to try and ease it up as it doesn't seem natural.
I tried to bolt it into place but couldn't get the nuts into the 3/4" tube so I ended up riveting it through large penny washers and an ally plate to spread the load a bit. It seems VERY secure now.
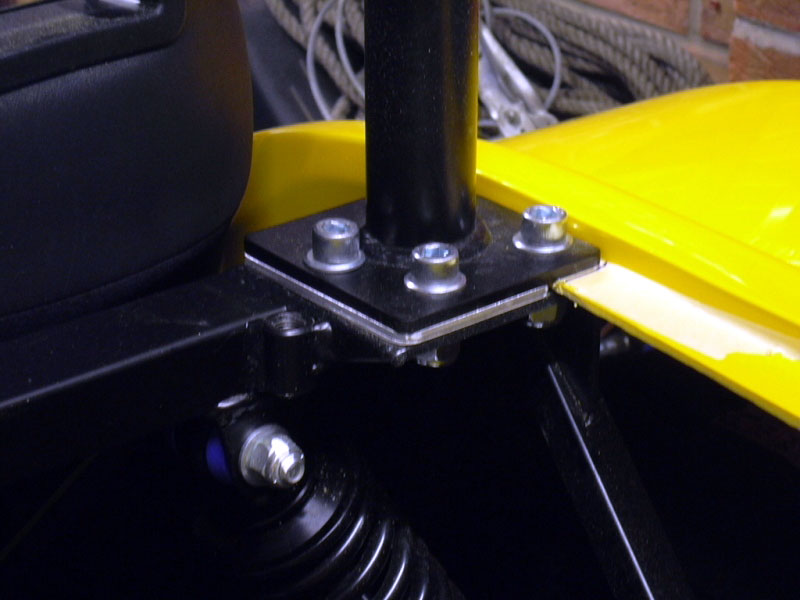 The manual says to bolt the rollbar through the tabs at the top but I didn't like the idea of a safety device bolting through fibreglass so I've cut down the tabs to about 3/4" and made up alloy plates so the rollbar bolts to something solid whilst holding the bodywork at the same time. Result, a solid backend so I can park my butt somewhere on a hot day.
(22/03/06)
Whilst still at the rear end I though I'd empty some of my parts boxes and get some garage space back so I decided to fit the fuel cap, well why not I hear you say?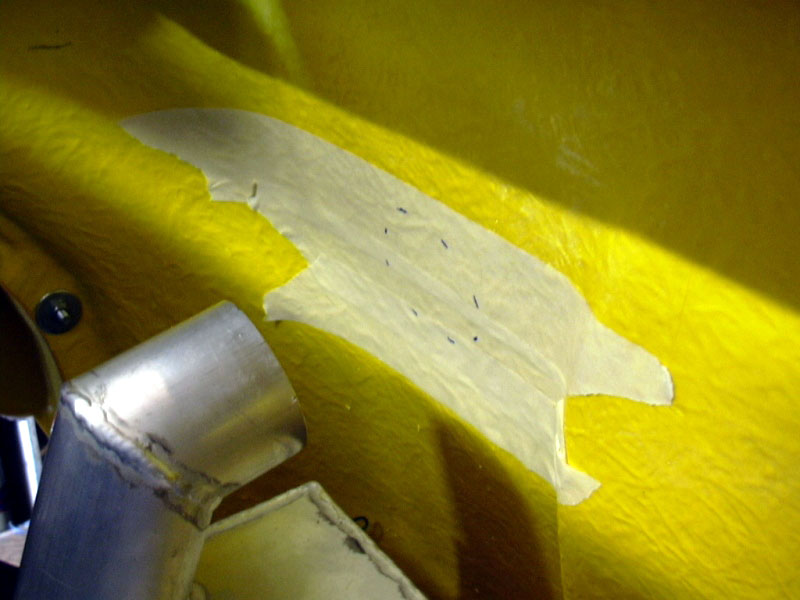
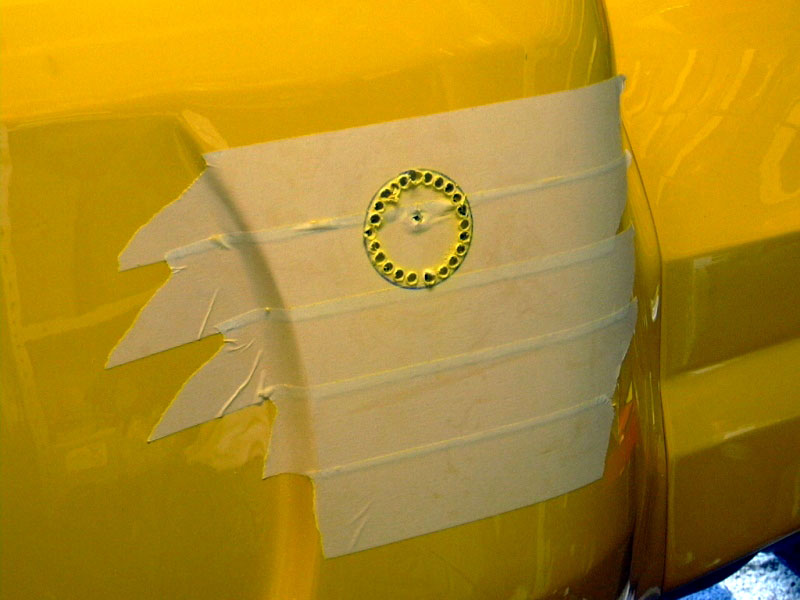

 Started off with marking the position from the rear of the panel by extending a ruler from the filler neck to the bodywork (pic1). Then drilled 4 pilot holes around the extreme edge and drew the circle on the outside using the cap as a guide.
Drilled out a series of 6mm holes and cut it out then using the trusty dremmel, smoothed out the circle shape. Then marked out the fixing holes and hey presto, one piece of damaged bodywork!
One thing I didn't count on was having to remove the petrol tank AGAIN to fit the perishing connecting pipe. Bolted it all into place and that's another thing off my ticklist which seems to be getting longer not shorter!
(26/03/06)
Something else I wish I had asked for is to have all the Rivnuts put into the chassis, especially the ones for the scuttle.
 As the main body tub was already on, I had to cut some larger holes in order to get the Rivnut gun near the chassis. It doesn't look pretty but they won't be seen so no problems. I had to mark the sides of the chassis to line up some holes for drilling into the scuttle as the drill wouldn't fit underneath the scuttle for a pilot hole. Fun and games to be sure.
(27/03/06)
The boot-box looks fairly easy to do, just cut a hole around the bar but then I forgot about the rear diagonal struts. I think I'll leave these until after the SVA as I have too much to do at the moment and I want to take my time and do it properly.


 In pic1, I cut a template around the roll-bar and transferred it onto the boot-box (pic2) then cut it out. This also had to be dremmel'd a bit just for some clearance. It's a pain to pull in and out as the diagonal across the bar gets in the way so I couldn't bolt the bar into place. I then test fitted the rear diagonal struts (pic3) but they needed some clearance cutting away from the side edges. They are tight and I ain't looking forward to cutting the boot-box for them but it has to be done.
(01/04/06)
It's a dry day so I have the chance to roll the car out of the cramped garage and get on with some more bodywork.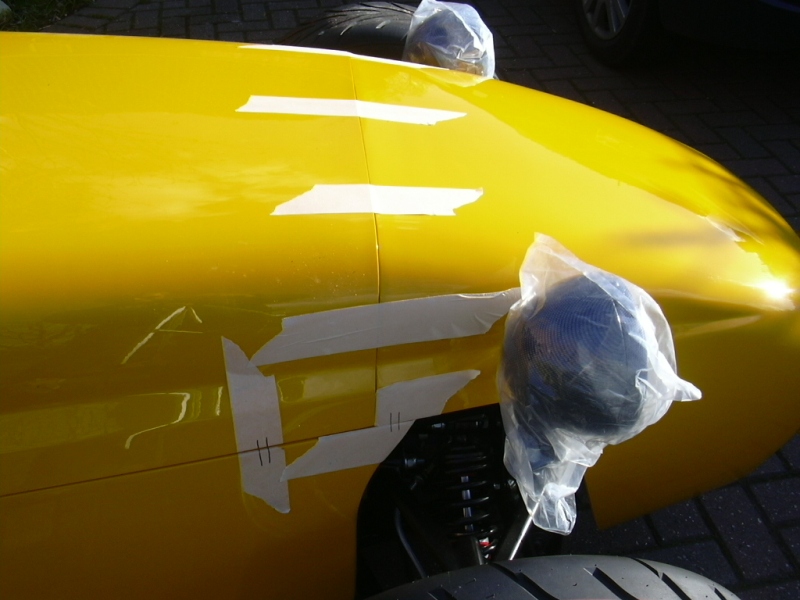
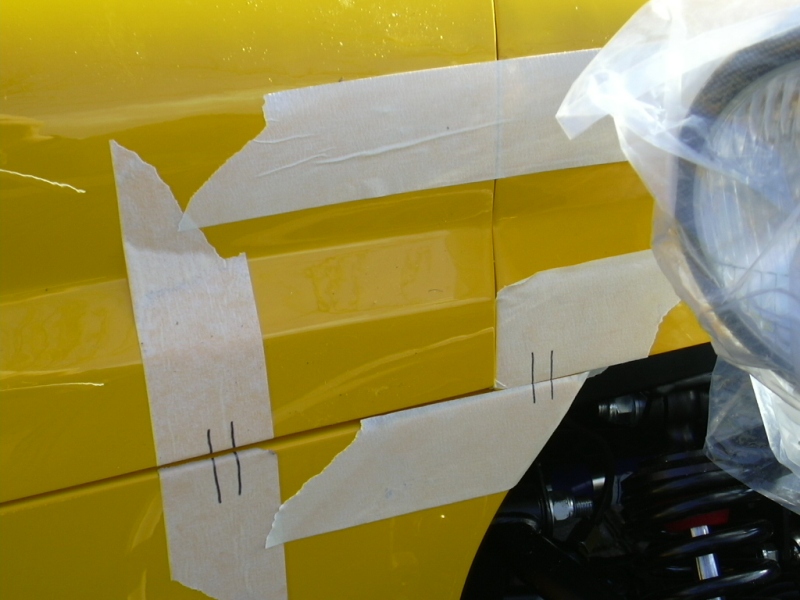
 I thought it was about time to fit the nosecone so out came the masking tape again. Any more tape on the car and I won't see the car! Second job was to line it all up with the bonnet on and clamp it down where I could then make some datum marks for lining it up later.

 Drilled the holes and bolted it down into the rivnuts Westfield had kindly fitted for free. Has to slot one of the holes very slightly and it all lined up beautifully even with the bonnet on. Last pic show it fitted only to be removed again for other work to be done - doh!
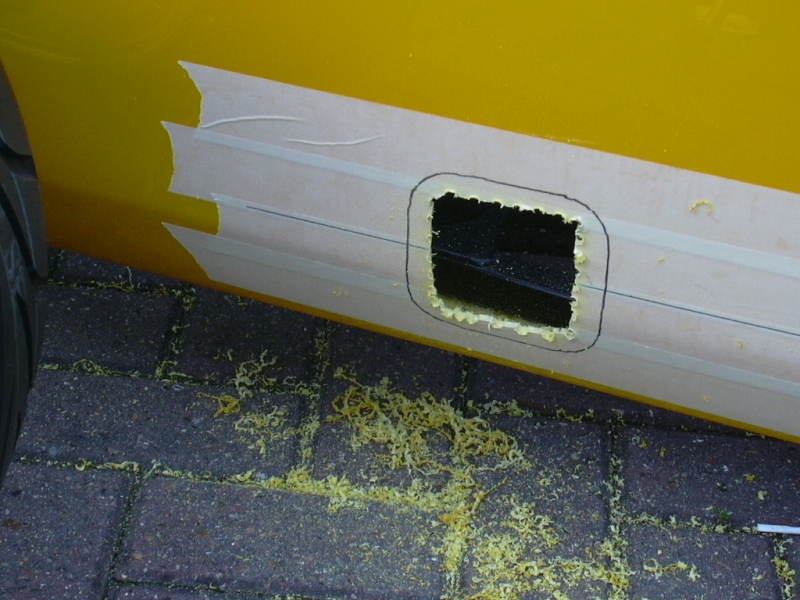
 Taking advantage of the nice weather I also cut out the hole for the Exhaust ready for Simpsons to thread a new system through. I just hope it's big enough.
By this time, I was covered head to toe in yellow dust. I had a few strange looks from passing strangers - hee hee! See Exhaust for more details.
(30/04/06)
Don't you just love bodywork, if you get it wrong, everybody will notice and boy will they notice on such a unique car.Bonnet and nosecone alignment is difficult (or I found so) and although I've taken much care, they don't line up perfectly so best fit reigns.
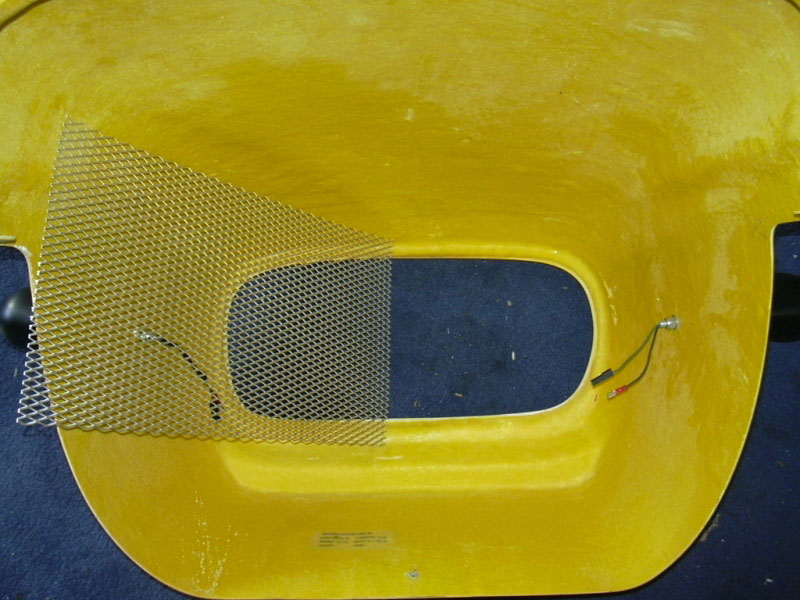
 Firstly, I made up a grille out of some B&Q alloy mesh. Very easy and cheap. Just cut out a suitable square and bend it over the edges of the hole. This was then held in place with sticky backed wiring cradles and tie-wraps. I had to spray if first with etching primer and satin black paint. Whilst this was drying, I fitted the bonnet pins.
 What you do here is clamp the bonnet and nose together, this can be done with the nose standing on the floor and placing the bonnet on top of it.
Align it as best you can and then clamp it down securely. Drill the two 5mm (I think) holes and then take it apart and open out the holes to the required size.
When you fit the rubber grommets in, don't forget to glue them in as they may fall out at some point, oh and oil/grease the insides of them so the pins slide in and out easily.
(14/05/06)
One of the membes on the WSCC forum was selling some "Real Carbon Fibre" rear arch protectors. I didn't realise until afterwards that Westfield Sportscars no longer supply them so they had to be bought.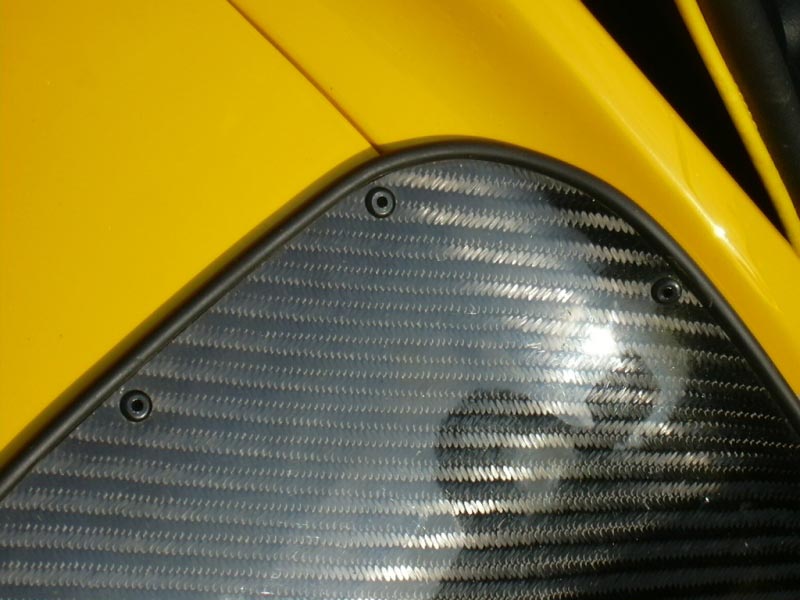 They came pre-drilled which was a bonus and fitted beautifully so it didn't take long to fit. Some builders fix them with silicone so they don't get the holes but I didn't have that choice.
I used some left over black rivets from the interior panels so you hardly notice. There were a couple of very small stone chips in them which were sorted by using some black boot polish and they look sweet.
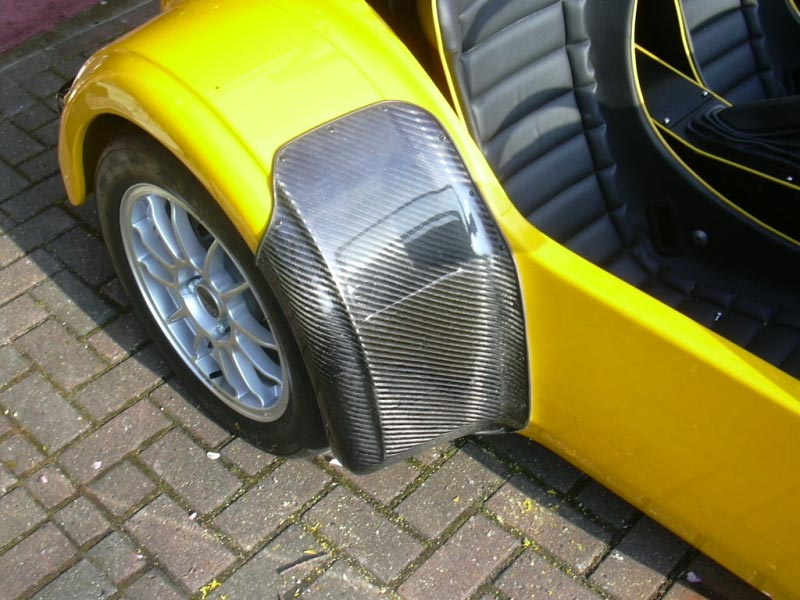
 Pictures left show one arch done and a long shot of the whole car so you can get a good view of the finished article.
As you can see, it was getting late in the day so didn't have much time for anthing else today but that's another job ticked off.
(21/05/06)
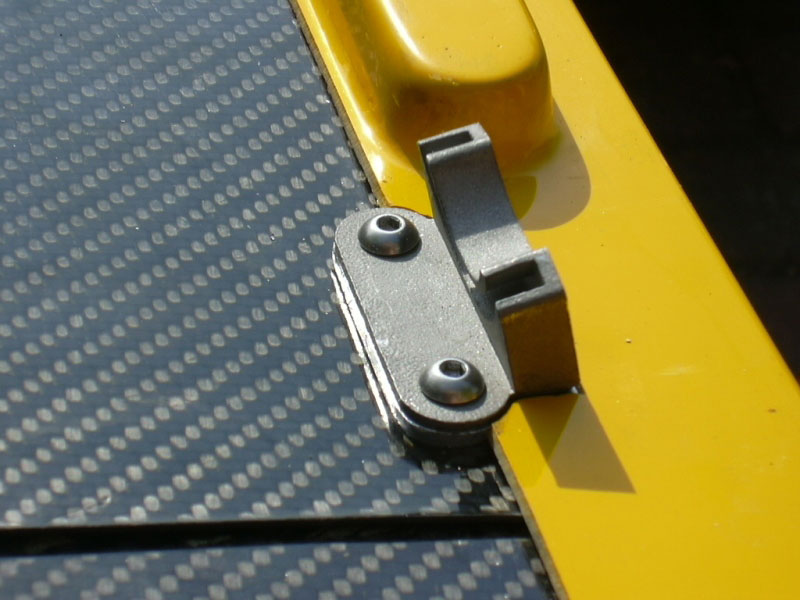
The dreaded bonnet catches, yet another job I wasn't looking forward to, in fact sometimes I wondered why I started this project buy hey, it will be worth it in the end.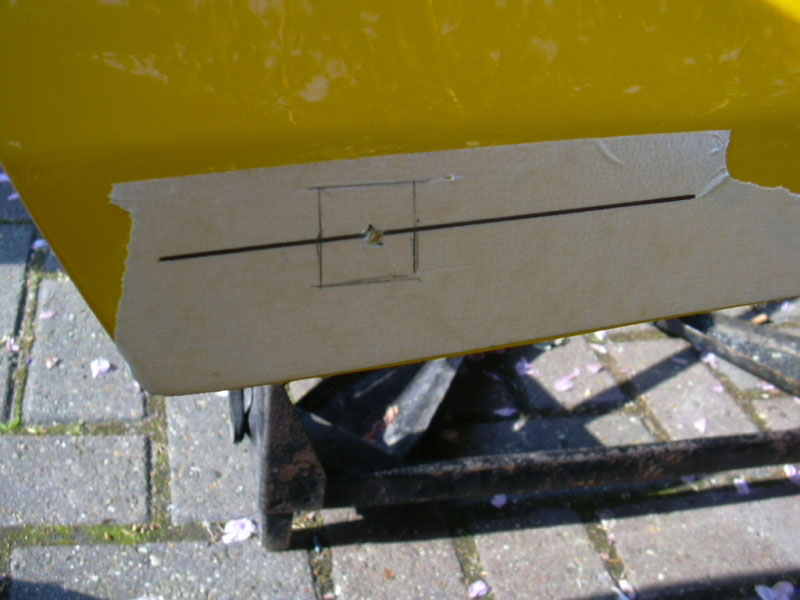
 First of all, it was a matter of marking out the holes using the Westfield template they supplied, I didn't deter too far from this as I intended to line up the plate to this on the other side.
Obviously using masking tape as in photos, I carefully drilled and cut out the hole which by the way is not square but kind of rounded edges.

 The lock was then bolted in place and the catch plate lined up and marked onto the chassis. This is so much easier if you remove the scuttle as you can see what you are doing. Ensure you have aligned the bonnet to the scuttle first and mark the bodywork so you have the bonnet in the correct place.
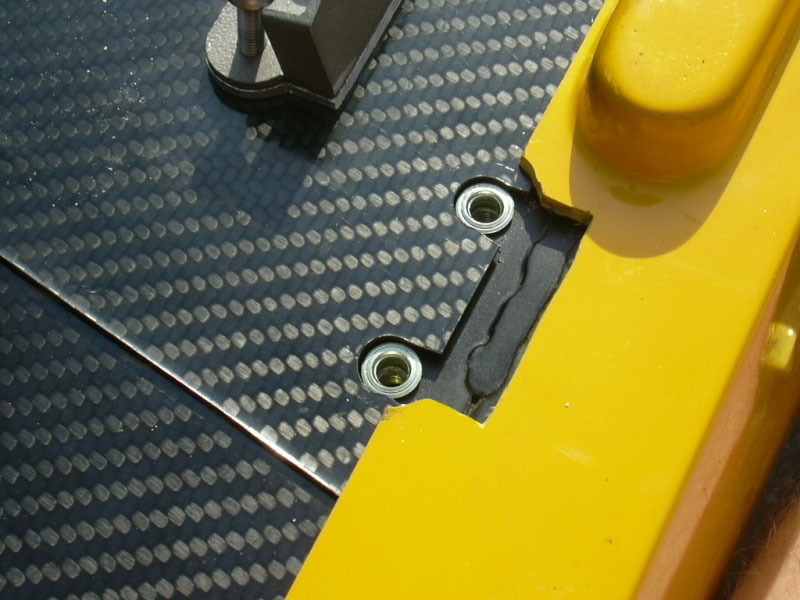
 I wanted to make the catch plates removable so I fitted some Rivnuts into the chassis and marked out the return edge so the plates fitted tidily (far left pic).
As the plate did not sit hig enough, I also had to make some packing plates which were shaped around the catch plate for a smarter appearance. You can make a couple of thin one so you can ensure the height is correct.
This was then bolted down into place and tested. It was a bit tight at first but after a few goes, it's now perfect. It pays to take time over these getting them just right as the last thing you want is your bonnet flying off.
(03/06/06)
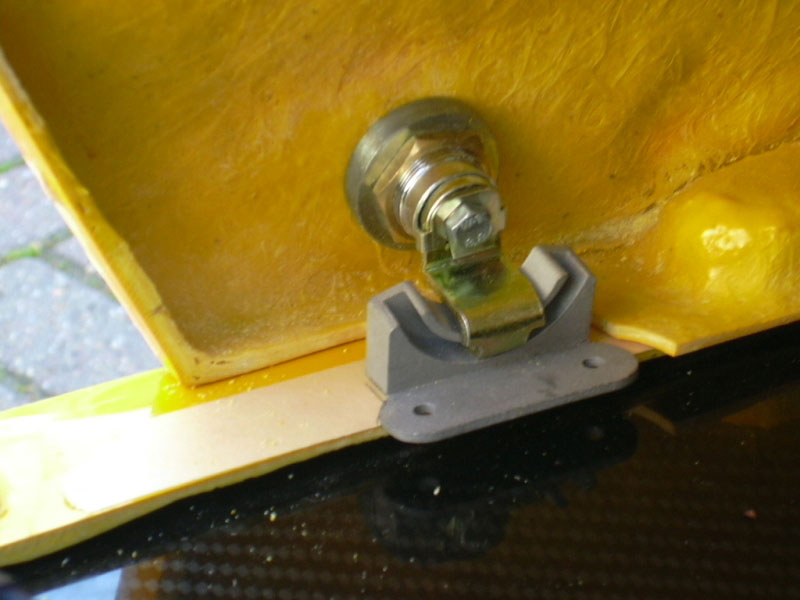
One of the final parts of bodywork to fit is the Cycle wings.I didn't want the bolt heads showing so I went for a hidden fixing called Bigheads. Nice bits of kit and available in all sorts of shapes and sizes.

 Firstly I needed to trial fit the cycle wings to see how far across I could drill the uprights to accept the bighead fasteners. I then trial fitted them to ensure the fitted on the flatest surface of the wing.
I then lined up the wing so the front edge just covered the wheel edge.

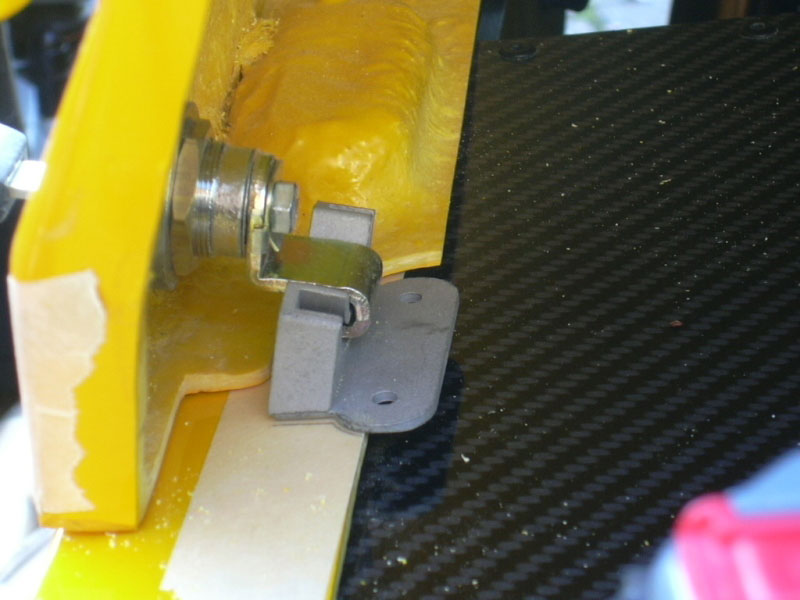
 Next thing to do was to mark onto the wing where they were going to be fixed and went about fiberglassing them on.
I dabbed a blob of the resin onto the wing and placed the fixing on, then cut out a section of the fiberglass mat and added more resin up to 3 layers thick. As you can see, the bigheads come with covers to protect the threads, I thought this was a nice touch.
A point to note here, place a cold wet cloth beneath the wing when doing this as the resin reaction will make the wing very hot and may deform it if it's not thick enough at that part. I then left it to set for 24 hours.
(04/06/06)
The next day, here's one I did earlier, or two in fact.

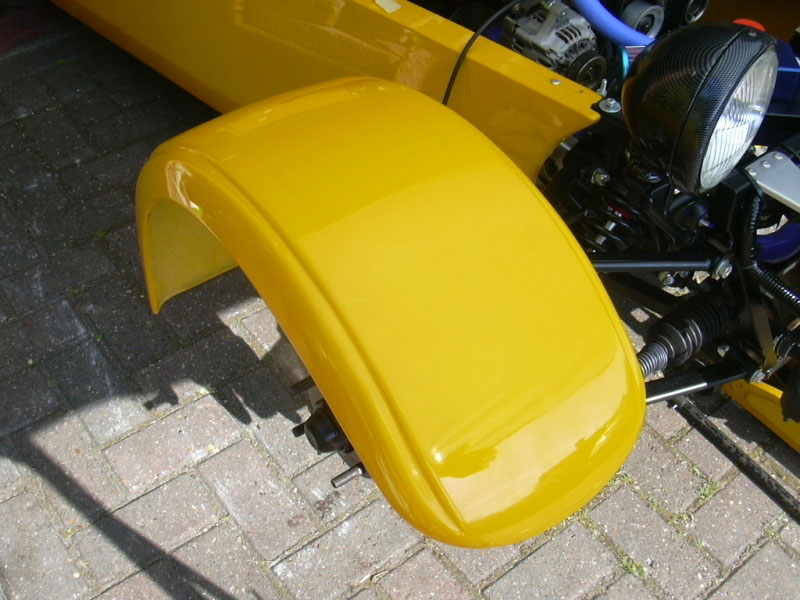 Fiberglass is messy stuff and I had a hell of a job to get a nice flat even finish so as you can see on the far left pic, I had to use my dremel to flatten down around the bolt base so it sat even on the wing stays. Something I didn't think about was actually bolting the wings to the stays, I forgot that the surfaces of the stays were almost 45 degrees different so this meant I had to slot the stays ever so slightly so the would drop into place.
I still put a thin foam layer onto the stays just for peace of mind and bolted them up.
In the final pic, you can see how clean the installation looks, just don't look underneath - LOL.