
(27/11/05)
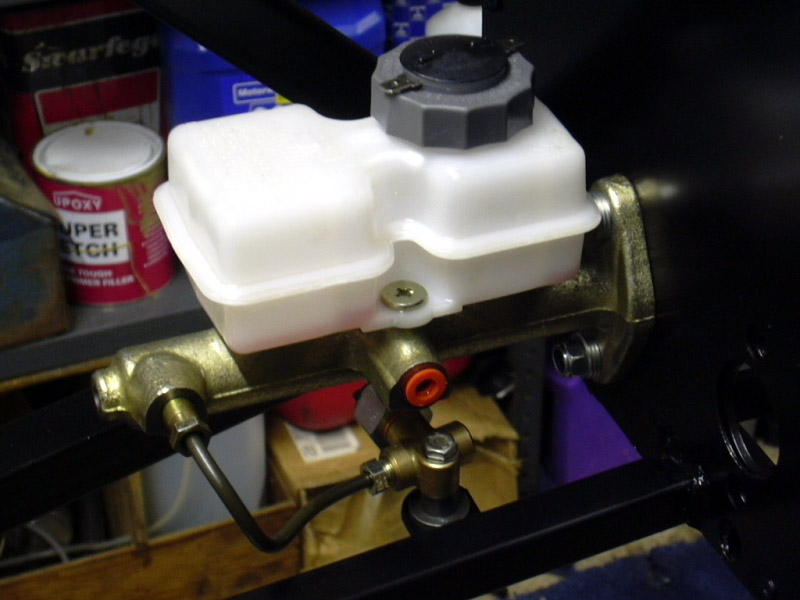
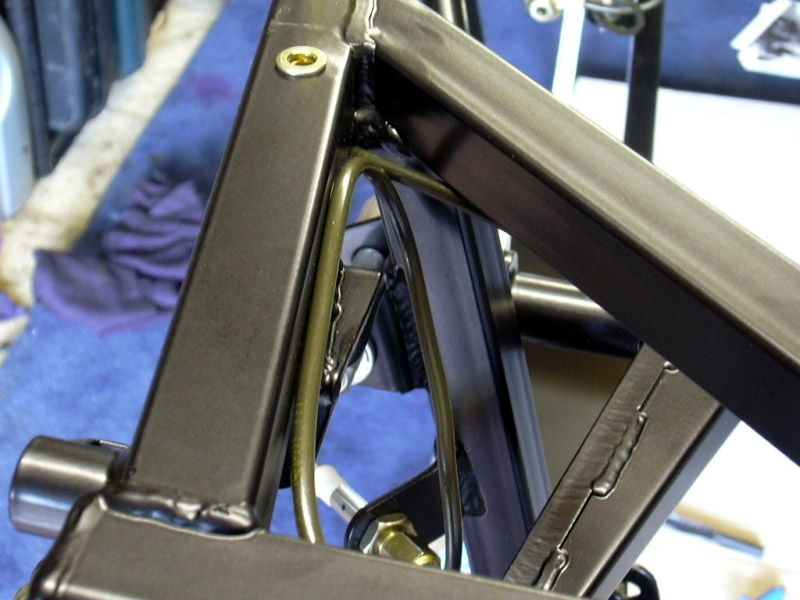
 I had a go at fitting the brake master cylinder and the first of the brake pipes. This was so I could gauge where the pipes would start for routing through the tunnel. Temporarily fitted the master cylinder as I don't have the correct length bolts, manual says there should be studs there but there aren't. Fitted the "T" piece below the cylinder and bent the smallest pipe into shape, what a bugger, it's so small it's hard to grip and bends in three directions. As you can see in the pic, I ended up mounting the "T" piece onto a small plastic spacer to raise it up, this will enable a smoother route over the bottom rail and through the tunnel.
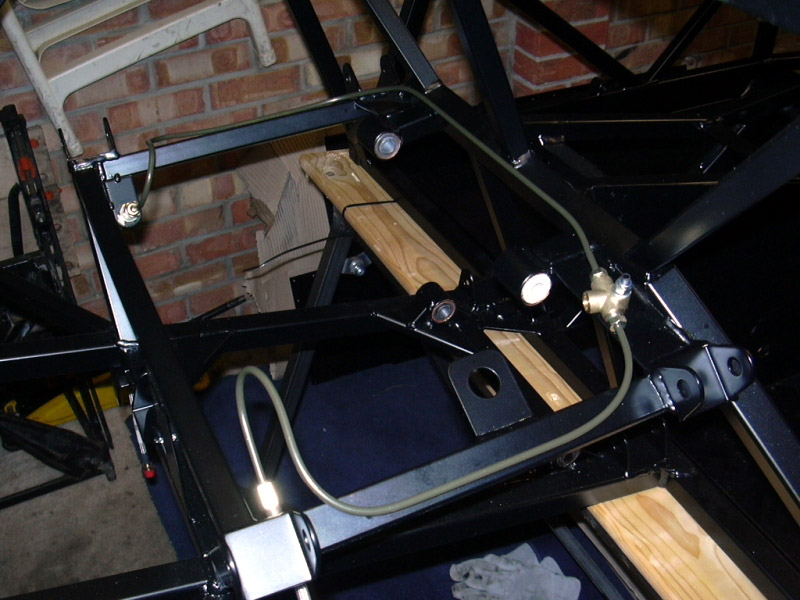 Off to the rear end now as I was having a bit of fun bending the pipes so I thought I'd have a go at the ones around the diff carrier. Fairly simple operation, just follow the edges of the carrier along to the rear "T" piece ensuring a nice flow. I had to adjust them a bit because the pipes are cut to length so if the bends are too sharp, it wouldn't meet the "T" piece.
Didn't do these up tight as they have to be removed later in order to fit the Differential which by the way, weighs approx 25kgs. Really getting on well now, two brake pipes and two panels, there's hope for a summer finish yet!
(28/11/05)
I was having so much fun yesterday with pipe bending, I thought I would carry on today. Before I could start the front brake pipes, I had to temporarily fit the Anti-roll bar as this is very near to the pipes and they need to be re-routed.
As you can see, the brackets that support the flexible pipes has to be bent out to avoid fouling the ARB arms (nearside shown). Do this slowly so as not to crack the powder coating.
 The pipes then have to be run down the front of the chassis rather than the inside as mentioned in the manual. (Nearside viewed from front). I haven't attached them with "P" clips yet as I don't have any. A quick call to Merlin and they should be here tomorrow (Wed). You can see from this photo how close they run to the arm of the ARB.
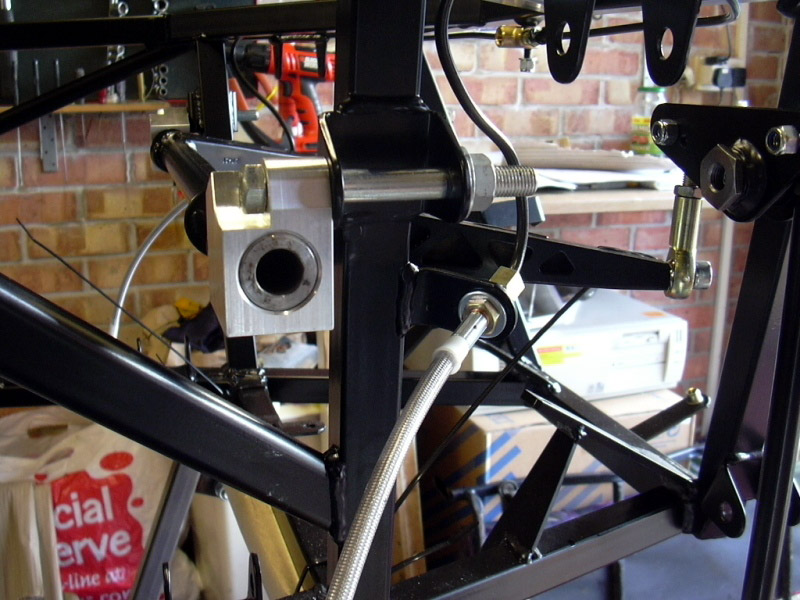 This shows the ARB setup and brake pipes from the offside. Note the angle to which the flexible pipes go backwards, these are longer than usual as I'm also fitting Widetrack, I just hope they will still reach! Both the front pipes fitted now and believe me, they were tight.
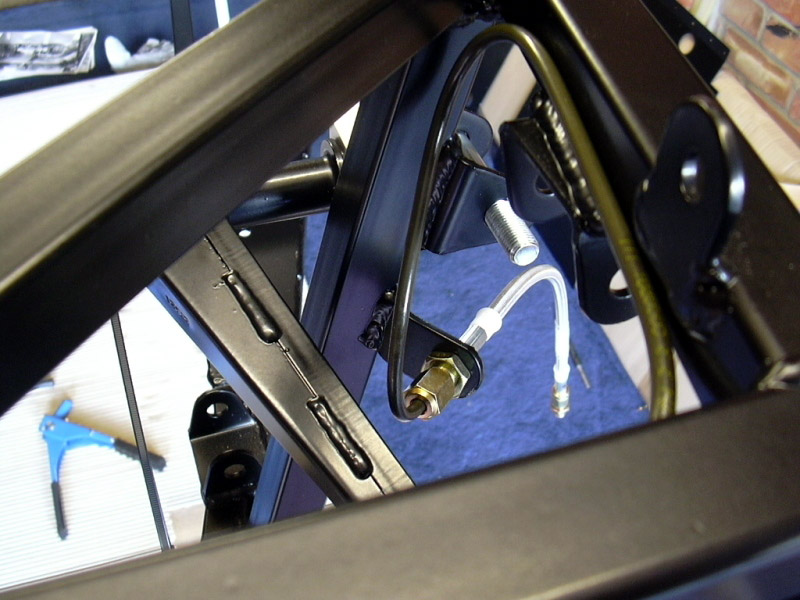
 Next onto the pipe from the Master cylinder to the front "T" piece, This one exits the front port (Primary) and makes a sharp u-turn under the master cylinder and over to the angled upright. I ran this up the front of the upright (1), along the chassis rail (2), behind the front upright, this runs close to the other front brake pipe so I'll have to "P" clip these away from each other (3), then underneath the front angles strut to the front "T" piece. By now I was getting a bit fed up of pipework and my thumb had gone numb - Owwww!
(1) (2)
(2) (3)
(3) (4)
(4)
Had to do some shopping for more drills down at B&Q as I couldn't find my spare ones, then back to do some more paneling.
(02/12/05)
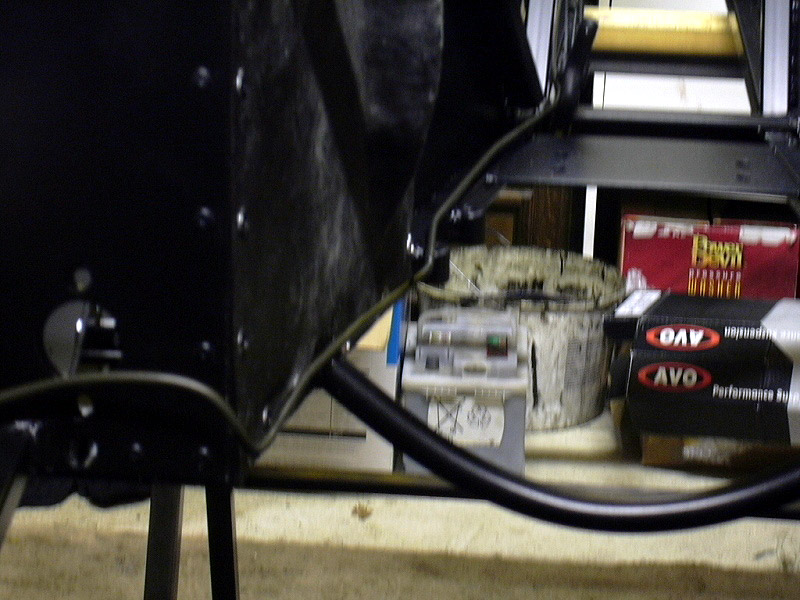
 Not happy with the brake lines fitted down the tunnel, as you can see in the second pic, they run very close to where the Diff is going to be so I've put that bit on hold for a while until I can get hold of a decent LSD. I'll probably have to either re-route them or go without .... nah re-route them is prob best
(03/12/12)
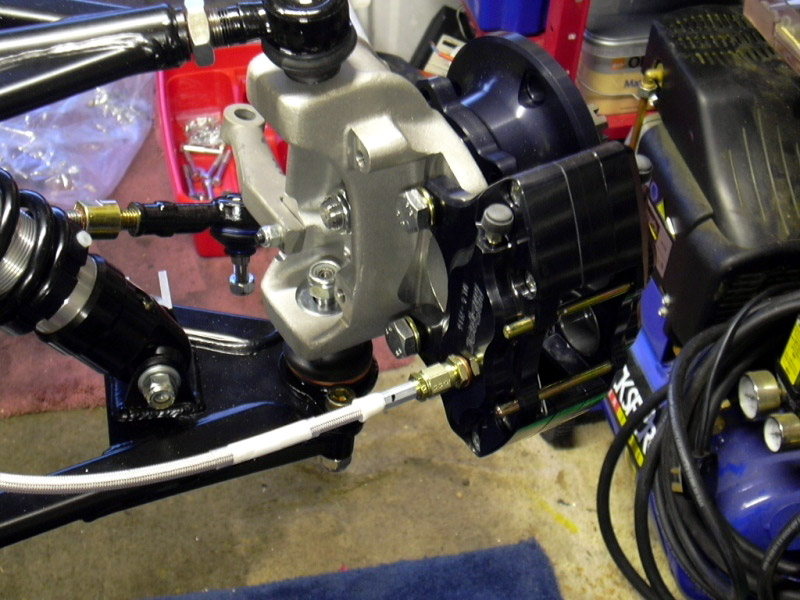
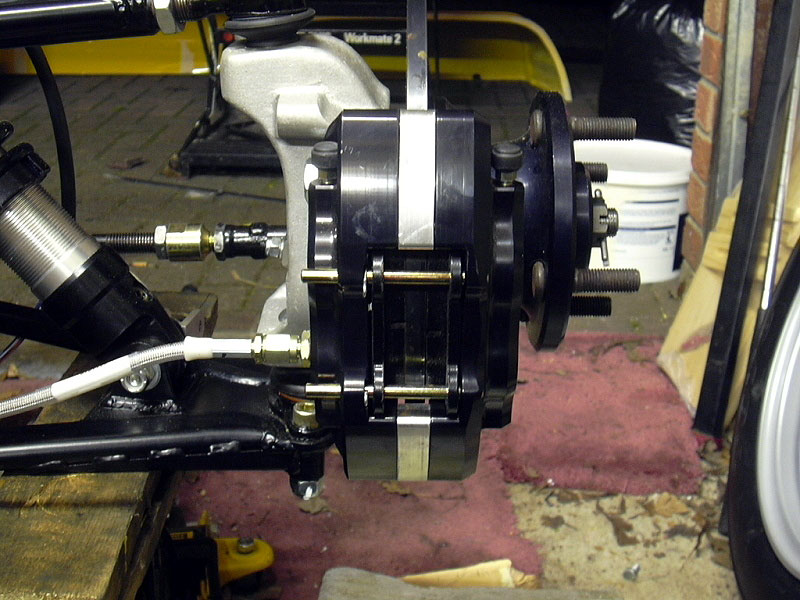
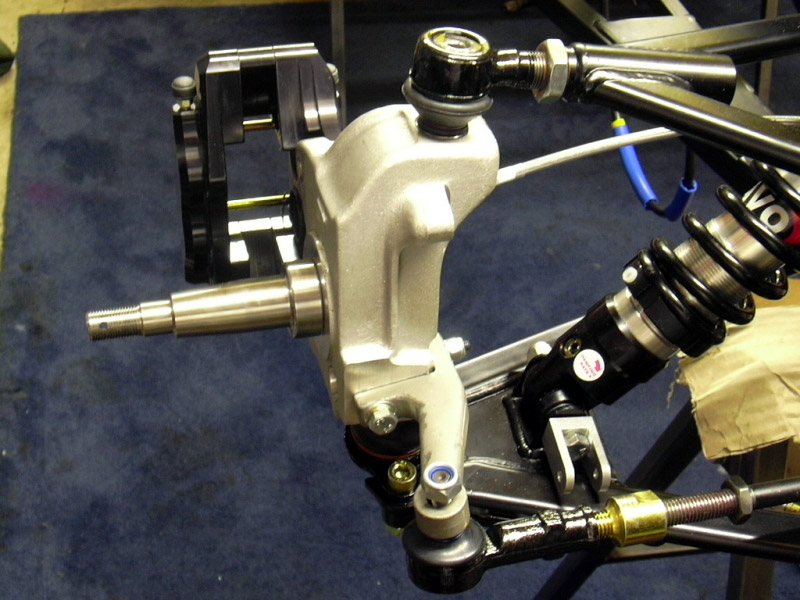 Not a lot done today on the brakes side, just put the front brake calipers on to ensure they fitted, these will of course have to be removed again to fit the disks. These are the Hi-spec ones which weigh next to nothing and are 4 pots, well recommended.
Also riveted all (except the tunnel one) the brake lines down with "P" clips, this was relatively easy remembering to keep a max of 250mm between each clip.
(09/12/04)
Finally got around to fitting the brake pipes down the tunnel. This has been held up because I wasn't sure how much room was available at the Diff end of the tunnel but now I have a Diff. I temporarily fitted it to gauge the space left for pipework.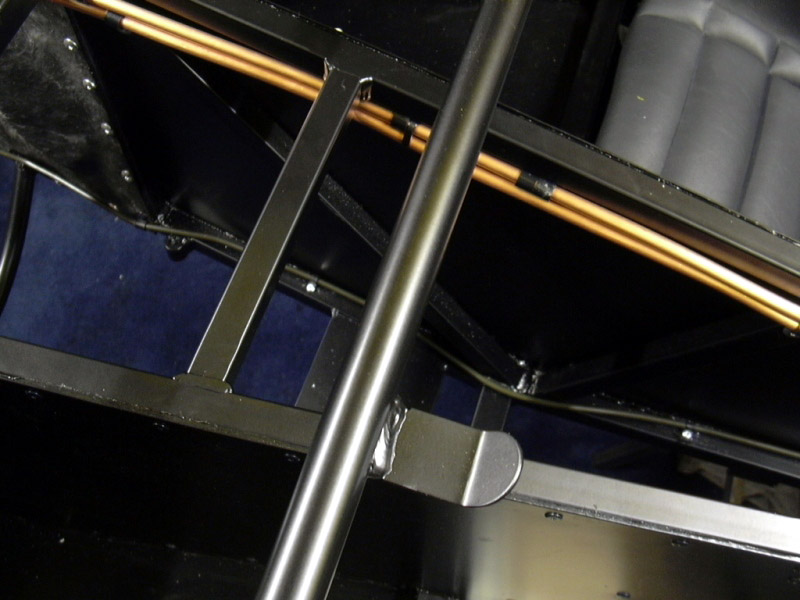
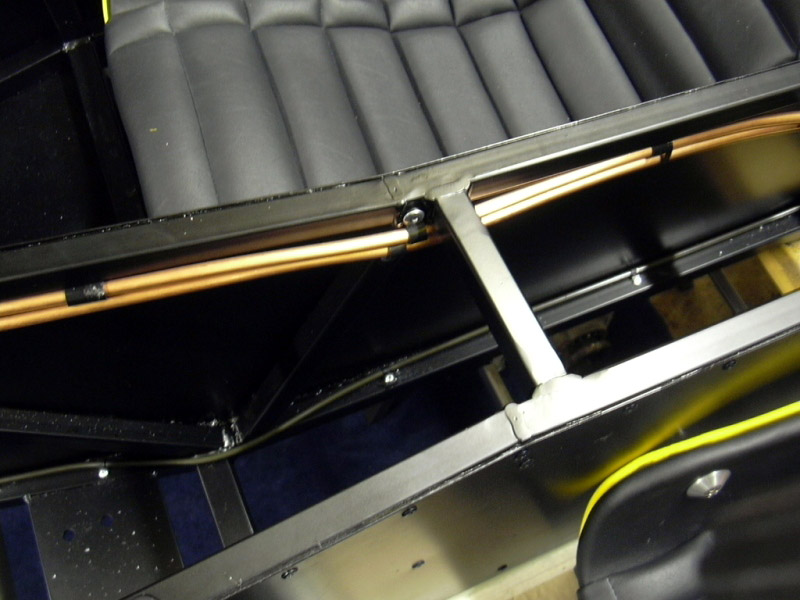

 These pics show the route I have taken along the bottom chassis rail and around and under the top diff mounting.
The brake pipe supplied by Westfield was long enough to take this route thus saving a bit more expense.
The gap (just in case you come across the same scenario) is 40mm from the bottom chassis rail upwards before there is any type of extrusion from the diff. This should give ample clearance for the brake pipes (he says fingers crossed).
I then riveted this down from above every 10"-12" as per SVA requirements.
(21/12/05)
I got my Front Disks yesterday but didn't have chance to fit them so I took 5 mins out from Wiring and fitted one of them just to see what it looks like - I know I'm a tart!
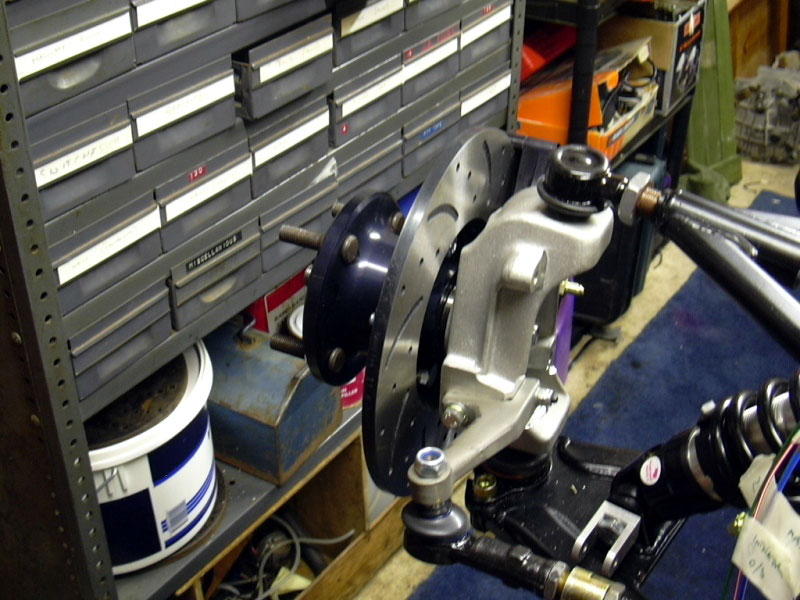 Don't they just look sweet. They're Raceleda disks which have been Cross-drilled and grooved and only weigh 2.7kg each. I'm sure with a bit of hard braking, I'll get that weight down even more! - lol.
I bolted them up to the hubs with Star washers (supplied) and thread locked them just for safety sake. Just got to fit the other one and I have half a braking system.
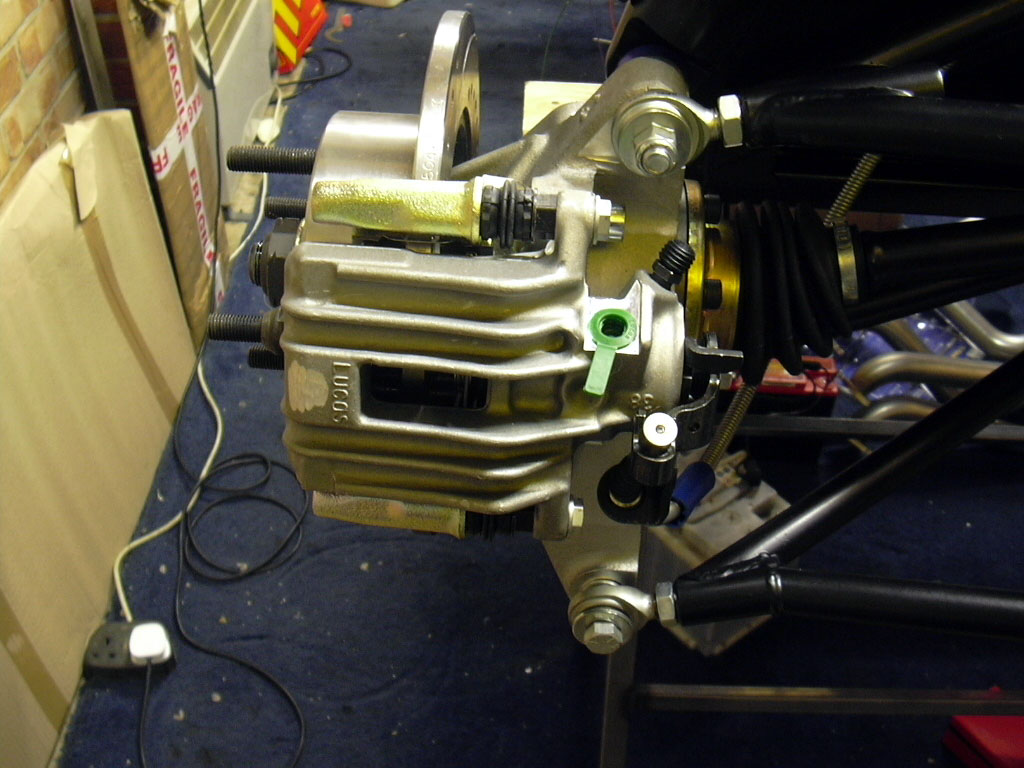
I also received the rear brake calipers and disks but the calipers didn't fit, they were the ones from Rally Design (Hydro Mechanical). Several problems were: Hydraulic bore was too big (could get an adapter), it also pointed right into the upright. The carrier was about 15mm short of bolting to the upright (not fixable), handbrake mechanism worked opposite way around, otherwise they were perfect!!!
I've now ordered the Golf calipers from Westfield, at least I know they WILL fit.
(02/02/06)
I finally got my Rear brakes from Westfield, seems there has been a shortage. These fitted very nicely with the supplied bolts.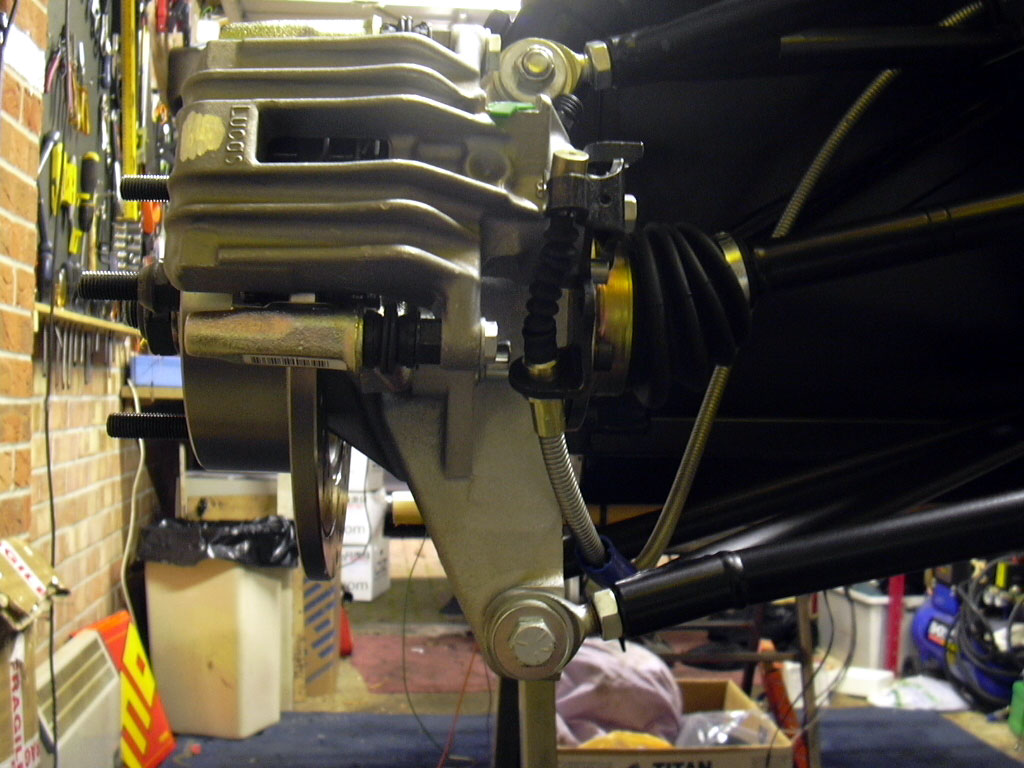
 To be able to tighten down the pan head bolts, I had to cut an old 8mm allen key down so I could fit an 8mm socket to my torque wrench. Not too happy with the angle that the handbrake cable fits into the lever, a bit acute but this is normal so I hear. The blue cable protector (shown in pic1) will be tie-wrapped in place to protect the brake cable from the sharp edges on the upright.
(16/02/06)
Handbrake time, Relatively straightforward.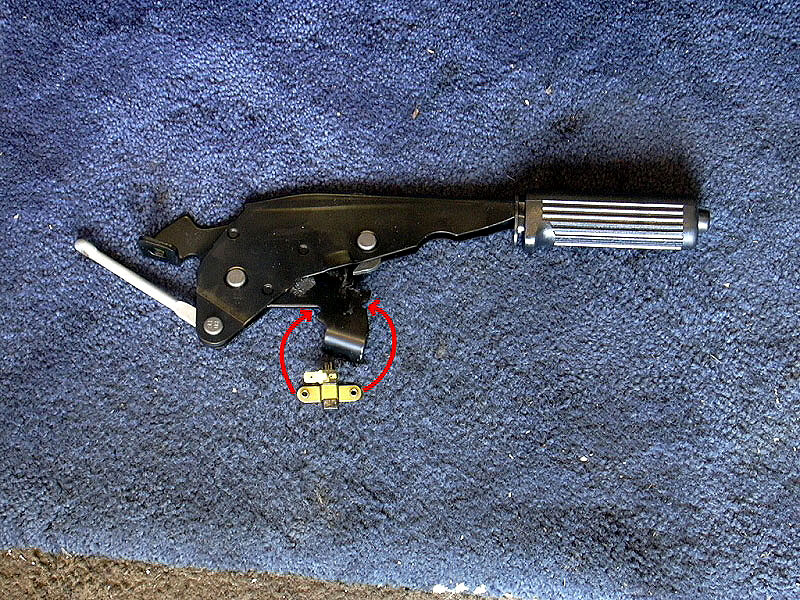 Firstly fit the handbrake warning light. This doubles as a brake test light switch so you need one. In the manual it says to bolt it to the handbrake but how? There are 2 notches either side of the base (arrowed) and the switch simply clamps around them.
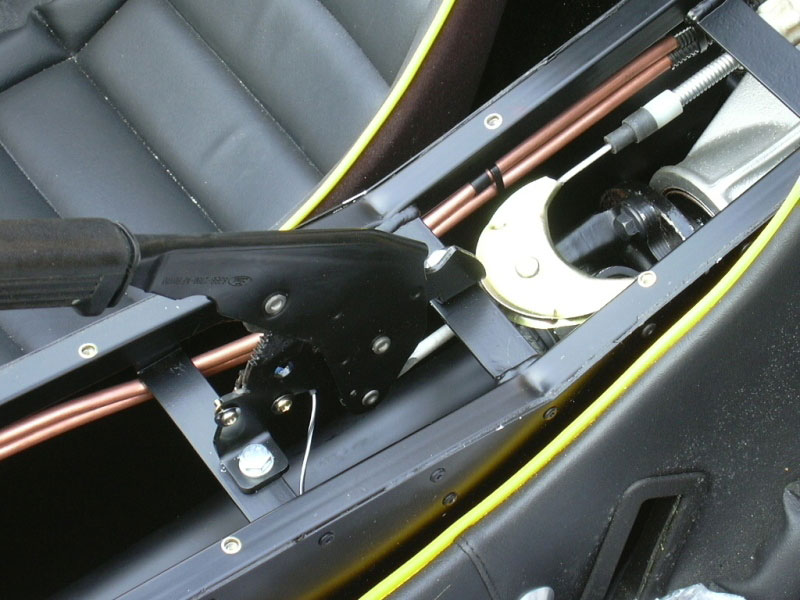
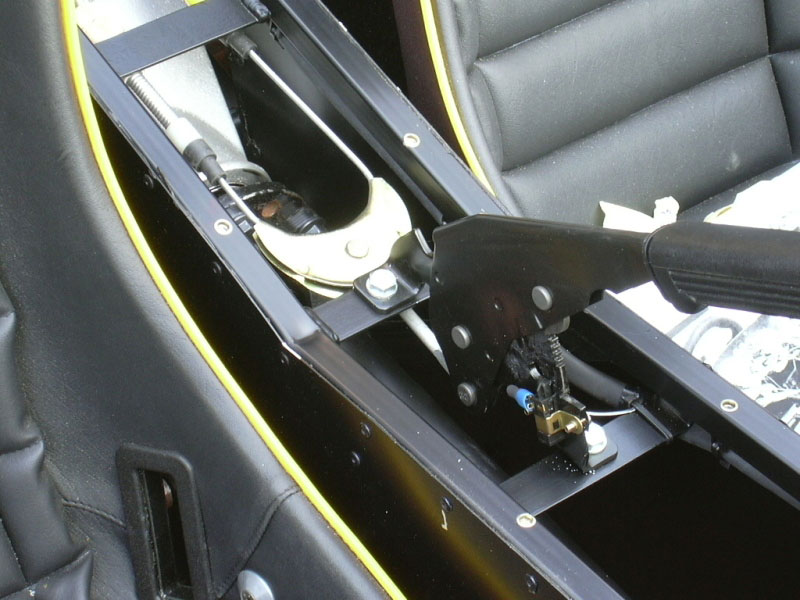 Fitting the handbrake to the chassis involved lining up the arm itself (not the locating holes) so it sits centrally in the tunnel. The tunnel cover should have already been cut to accommodate this. I then had to loosen off the handbrake cable and connect up the compensator with a split pin.
Unfortunately, I have done some unique plumbing with my fuel lines/Brake lines and it prevents me running the handbrake cables below the front of the diff as shown in the manual so I've had to run them over the top. This works fine and clears everything in the rear compartment and routes very tidily around the rear suspension into the brake calipers.
Also fitted new Aeroquips to the rear as I found out I had the wrong ones. The Golf ones have a right-angled end to go into the top of the calipers (pics to follow)
(16/03/06)
I have discovered that my front calipers are too wide for my disks as I'm using the Raceleda grooved disks as you know (or didn't you?). These are Hi-spec Ultralight 4's and are setup for 12mm disks but mine are 9mm so I've had to change the spacers to suit.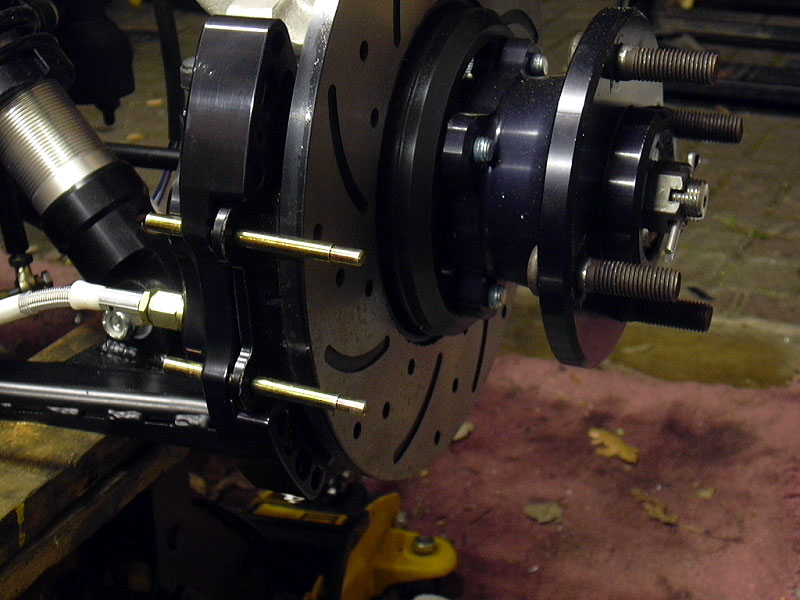

 Ordered them from Hi-spec and they came through very quickly and at approx £39.00 for a pair wasn't extortionate. Simple to do if you have a 29nm torque wrench which I don't. However, I decided to change them first which can be done on the car by unscrewing the four bolts and replacing with the said items. In pic 2, you can see what you get in the kit and along side the original (black) spacers. I have since spoken to Hi-spec and if I take the calipers to them, they will tighten them up for me .... nice chaps eh?